WP Smith

Creating WordPress & Genesis Websites Since 2010

  • Home
  • About
  • Services
  • Blog
  • Contact

Sep 28 2015

Creating a Fun Shortcode: Tetris on WordPress

For a project that I am currently doing, they had some great ideas for great user experience throughout the site. One of them included a game, so I created a Tetris Shortcode (all future changes will only be maintained in the Github repository, not in the gist) where they could place the game anywhere they wanted. So, for your pleasure, enjoy!

How I Built It

I found a JavaScript library called blockrain.js that I refactored, documented, and extended. If you were to compare the original library and mine, there are some substantial differences. Essentially, I made these changes:

  • Renamed blockrain.jquery.js to jquery.blockrain.js according to standard jQuery plugin naming convention and standards
  • Attempted (i.e., not tested) to add touch support with jgestures.
  • Added a preview of the next block and a onPreview API.
  • Refactored the ShapeLibrary to be faster and not to reprocess for each next block.
  • Extended keyPressHandler to execute onKeyPress for unsupported keys.

Below I will describe how I built the WordPress Shortcode plugin.

Plugin File

First, I started with a basic plugin header:

/**
* Plugin Name: Tetris
* Plugin URI: http://wpsmith.net/
* Description: Adds tetris game shortcode.
* Version: 0.0.1
* Author: Travis Smith, WP Smith
* Author URI: http://wpsmith.net
* Text Domain: tetris
*
* @copyright 2015
* @author Travis Smith
* @link http://wpsmith.net/
* @license http://www.gnu.org/licenses/old-licenses/gpl-2.0.html
*
* This program is distributed in the hope that it will be useful,
* but WITHOUT ANY WARRANTY; without even the implied warranty of
* MERCHANTABILITY or FITNESS FOR A PARTICULAR PURPOSE.
*
*/

Next, I added basic security that I add to every plugin base file (and probably should add on every file) to prevent direct access to the file.

// If this file is called directly, abort.
if ( ! defined( 'WPINC' ) ) {
die;
}

Then, I add my three basic constants that I add to every plugin I build.

define( 'TETRIS_VERSION', '0.0.1' );
define( 'TETRIS_SLUG', 'tetris' );
define( 'TETRIS_FILE', __FILE__ );

I do not really use TETRIS_VERSION and probably could easily remove it, but I add it out of habit. TETRIS_SLUG serves as both the plugin slug and my text domain. TETRIS_FILE is a constant that I use to access __FILE__ of the root/main plugin file instead of having to worry about adding extra functions around __FILE__ on other files to get back to that root file reference.

Now, I add my auto-loader function. Essentially this function checks to see if the class does not exist and that the class name has a Tetris_ prefix. I name all my class files the same as my class contained within the file. If it meets those conditions, then I include the file.

spl_autoload_register( 'tetris_autoload' );
/**
* SPL Class Autoloader for classes.
*
* @param string $class_name Class name being autoloaded.
* @link http://us1.php.net/spl_autoload_register
* @author Travis Smith
* @since 0.1.0
*/
function tetris_autoload( $class_name ) {
// Do nothing if class already exists, not prefixed WPS_
if ( class_exists( $class_name, false ) ||
( !class_exists( $class_name, false ) && false === strpos( $class_name, 'Tetris_' ) ) ) {
return;
}
// Set file
$file = plugin_dir_path( __FILE__ ) . "includes/classes/$class_name.php";
// Load file
if ( file_exists( $file ) ) {
include_once( $file );
}
}

Normally, I add code for plugin activation and deactivation as well as for loading the text domain, but I am going to skip that for this post. For the purposes of the scope of the plugin, we are only instantiating the Shortcode class.

new Tetris_Shortcode();

Shortcode Class

Class Variables

The shortcode class has 3 variables: $debug, $scripts_registered, and $scripts_enqueued. These three variables are for tracking whether the site is in debug mode, set by WP_DEBUG and/or SCRIPT_DEBUG. The other two variables track whether the scripts have already been registered and/or enqueued to ensure that the class does not add them again.

The Constructor

Once the plugin has been instantiated, the Shortcode class adds the shortcode, sets the $debug variable, and registers the scripts on the init hook.

/**
* Constructor
*/
public function __construct() {
// Add the shortcode
add_shortcode( 'tetris', array( $this, 'shortcode' ) );
// Set debug class var.
$this->debug = ( ( defined( 'WP_DEBUG' ) && WP_DEBUG ) || ( defined( 'SCRIPT_DEBUG' ) && SCRIPT_DEBUG ) );
// Register scripts!!
add_action( 'init', array( $this, 'register_scripts' ), 11 );
}

Registering the Scripts/Styles

This is really tricky with shortcodes primarily because the shortcode could or could not be used within the displayed page (content/post type agnostic). With shortcodes, I always register the scripts at the init hook, just like core. The really cool part of how I register scripts is that I do it dynamically: if in debug mode, use the debug script (the non-minified file) otherwise, use the minified script (*.min.js). What is more, I also do not use the TETRIS_VERSION constant created earlier for my script versions any more. Call me lazy, but now I use filemtime(). This bursts the cache every time I change the file, so I never have to worry about caching with my scripts/styles.

Registering Scripts/Styles Dynamically

The key to dynamically registering the script is my $debug variable which uses the $debug class variable.

$suffix = $this->debug ? '.js' : '.min.js';

Next is the portion that actually registers the jgestures, blockrain, and blockrain-init scripts.

wp_register_script(
'jgestures',
plugins_url( "js/jgestures$suffix", TETRIS_FILE ),
array( 'jquery', ),
filemtime( plugin_dir_path( TETRIS_FILE ) . "js/jgestures$suffix" ),
false
);
wp_register_script(
'blockrain',
plugins_url( "js/jquery.blockrain$suffix", TETRIS_FILE ),
array( 'jquery', 'jquery-ui-widget', 'jgestures', ),
filemtime( plugin_dir_path( TETRIS_FILE ) . "js/jquery.blockrain$suffix" ),
false
);
wp_register_script(
'blockrain-init',
plugins_url( "js/blockrain.init$suffix", TETRIS_FILE ),
array( 'blockrain', ),
filemtime( plugin_dir_path( TETRIS_FILE ) . "js/blockrain.init$suffix" ),
false
);

*Note the use of filemtime().

Also, when I registered the blockrain script, notice that I set jquery, jquery-ui-widget, and jgestures as dependent scripts, and when I registered the blockrain-init script, notice that I set blockrain as its dependent. This is extremely important later.

array( 'jquery', 'jquery-ui-widget', 'jgestures', ),

array( 'blockrain', ),

Next, I need to localize some scripts because blockrain has a couple string variables.

$args = array(
'playText' => __( 'Let\'s play some Tetris', TETRIS_SLUG ),
'playButtonText' => __( 'Play', TETRIS_SLUG ),
'gameOverText' => __( 'Game Over', TETRIS_SLUG ),
'restartButtonText' => __( 'Play Again', TETRIS_SLUG ),
'scoreText' => __( 'Score', TETRIS_SLUG ),
);
wp_localize_script( 'blockrain-init', 'blockrainI10n', $args );

Finally, I register my style similarly to my scripts.

$suffix = $this->debug ? '.css' : '.min.css';
wp_register_style(
'blockrain',
plugins_url( "css/blockrain$suffix", TETRIS_FILE ),
null,
filemtime( plugin_dir_path( TETRIS_FILE ) . "css/blockrain$suffix" )
);

Enqueuing Scripts

My next method enqueues the scripts with only two lines. These two lines output all the scripts because blockrain-init depends on blockrain which depends on jquery, jquery-ui-widget, and jgestures. So, WordPress's script manager class will output the scripts in the proper order:

  1. jquery
  2. jquery-ui-widget
  3. jgestures
  4. blockrain
  5. blockrain-init
/**
* Output the scripts for WordPress
*
* @uses wp_enqueue_script
*/
public function enqueue_scripts() {
if ( $this->scripts_enqueued ) {
return;
}
// Ensure scripts are registered
$this->register_scripts();
/* SCRIPTS */
wp_enqueue_script( 'blockrain-init' );
/* STYLES */
wp_enqueue_style( 'blockrain' );
// Prevent redundant calls
$this->scripts_enqueued = true;
}

The Shortcode

Now, I have my scripts registered and I have my enqueue (script output) method. For my shortcode, I only want to accept two arguments: height and weight, which I will parse and merge using shortcode_atts(), noting that someone can filter these options with shortcode_atts_tetris filter.

$atts = shortcode_atts( array(
'height' => '100%',
'width' => '100%'
), $atts, 'tetris' );

Next, I want to output my scripts.

$this->enqueue_scripts();

Then I return my HTML markup.

return sprintf( '<div class="tetris-game" style="max-width:%s; max-height:%s;"></div>', $atts['width'], $atts['height'] );

For those who do not know what sprintf() does, let me explain it briefly. Simply, it takes the string and locates various sub-strings (e.g., %s, %d, %1$s, %1$d, etc.). The %s replacement does a simple validation and replaces the %s sub-string with only a string or an empty string. Likewise, %d does numbers. If you see 1$, 2$, etc. between %s or %d (etc), that is identifying the index of the following parameters. For example, I could have written that line as:

return sprintf( '
', $atts['width'], $atts['height'] );

So, 1$ refers to $atts['width'] and 2$ refers to $atts['width'], both which must be strings.

That completes the shortcode. Again, all future changes will only be maintained in the Github repository, Tetris Shortcode, not in the gist found in this post.

Remaining Work

  • Load the text domain
  • Activation/Deactivation code
  • Ensure that the Shortcode class can only be instantiated once as a true singleton.

Written by Travis Smith · Categorized: WordPress · Tagged: Shortcode

Sep 23 2015

Extending Any Plugin Properly

Extending Outline
  • Potential Problems & Requirements
  • Demonstration
  • Example Usage
  • WPS_Plugin_Extend Class

For many one-off development projects and almost all full website development projects, I often extend plugins. Most people place these extensions inside their functions.php file cluttering the file with all sorts of code. I prefer to separate my code base into parts that make sense. For example, if I am hooking into a Gravity Forms, even for only one hook, I create an extension plugin (e.g., Gravity Forms - Customizing Notifications).

For clarification purposes, let me define a couple of terms: extension plugin and dependency plugin.

Extension Plugin
A plugin that extends or increases the scope or application of another plugin (e.g., Gravity Forms - Date Range Field).

Dependency Plugin
A plugin that is dependent upon another plugin or needs another plugin for support or operation (e.g., Gravity Forms).

Potential Problems & Requirements

Creating an extension plugin that is dependent on a dependency plugin creates some potential problems. Some of these problems could be:

  • White Screen of Death: Site breaks because of a missing function and/or class and the developer forgot to check whether the function or class exists (e.g., class_exists( 'My_Dependent_Class' ) or function_exists( 'my_dependent_function' )).
  • The extension plugin doesn't deactivate when dependency plugin deactivates resulting in additional overhead or code bloating.
  • The extension plugin is activated before the dependency plugin is activated, but WordPress says the plugin was activated.

To prevent these issues, we would like to:

  • Prevent the activation of the extension plugin if the dependency plugin is not activated.
  • .

  • Auto-deactivate the extension plugin if the dependency plugin is deactivated.
  • Notify the user that the plugin has been deactivated and the reason why it has been deactivated to improve the user experience.,

So, I have a class that is part of my development framework called WPS_Extend_Plugin that makes this a piece of cake.

Demonstration

For demonstration purposes, I am going to extend Gravity Forms to create a new field called Date Range (plugin named: Gravity Forms - Date Range). My requirements are simple:

  • I do not want to have this plugin activated without Gravity Forms activated.
  • I want the plugin to auto-deactivate if Gravity Forms is deactivated.
  • I want the user to know what happened

The Plugin Setup

As you can see from the screen capture are both of my plugins are not activated.
Extending Any Plugin Example Both Plugins Deactivated

Activating the Extension Plugin without the Dependency Plugin Activated

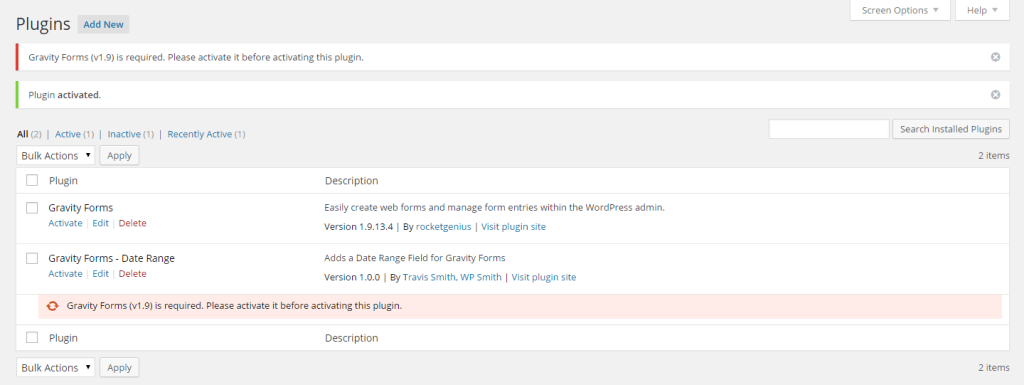
In the example below, I activate the extension plugin without the dependency being activated. This will create two error notifications: one in the admin notices area and the other on the plugin row. However, as you can see WordPress does not "check" to see if the plugin actually activated. Instead, WordPress assumes the plugin was activated and outputs the activation message.
Extending Any Plugin Example Activating the Extension Plugin Alone

Activating the Dependency Plugin and Extension Plugin Properly

In this example, I activate both plugins "normally" and "properly" where I activate the dependency first and then the extension plugin second. Everything works as expected.
Extending Any Plugin Example Activating the Dependency Plugin First
Extending Any Plugin Example Activating the Extension Plugin Second

Activating the Extension Plugin without the Correct Dependency Plugin Version

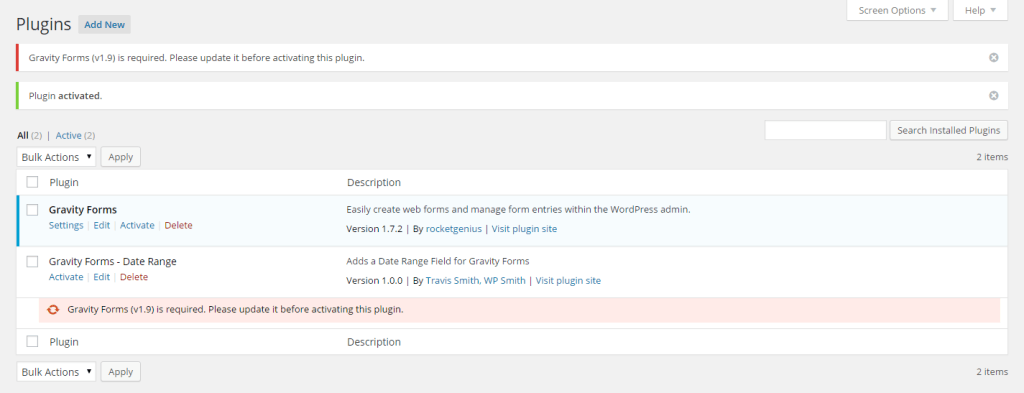
In the example below, I activate the extension plugin without the proper dependency plugin version being activated. As you can see the dependency plugin exists and is activated; however, I have marked the extension plugin to depend on a version greater than the version that is activated. This too will create two error notifications: one in the admin notices area and the other on the plugin row. However, as you can see WordPress does not "check" to see if the plugin actually activated. Instead, WordPress assumes the plugin was activated and outputs the activation message.
Extending Any Plugin Example Activating the Extension Plugin with Wrong Version of Dependency Plugin

Usage

Using this class is quite simple. Just add it to your plugin in whatever directory and require the file.

// Require WPS_Extend_Plugin class
require_once( 'classes/WPS_Extend_Plugin.php' );

Then if you want to require a plugin, just instantiate the class. Here are two examples of extending Gravity Forms and AddThis.

// Extend Gravity Forms
new WPS_Extend_Plugin( 'gravityforms/gravityforms.php', __FILE__, '1.9', 'my-plugin-text-domain' );
// Extend AddThis
new WPS_Extend_Plugin( 'addthis/addthis_social_widget.php', __FILE__, '1.9.13', 'my-plugin-text-domain' );

If you would like to require more than one plugin at a time, you can use my function wps_extend_plugins:

if ( !function_exists( 'wps_extend_plugins' ) ) {
/**
* Determines whether the plugins are active and available taking appropriate action if not.
*
* @since Version 1.0.0
* @author Travis Smith <[email protected]>
*
* @see WPS_Extend_Plugin
*
* @param array $plugins
* @param string $root_file Plugin basename, File reference path to root including filename.
* @param string|null $text_domain Text domain.
*/
function wps_extend_plugins( $plugins, $root_file, $text_domain = null ) {
$plugin_extensions = array();
foreach ( $plugins as $plugin => $min_version ) {
$plugin_extensions[ $plugin ] = new WPS_Extend_Plugin( $plugin, $root_file, $min_version, $text_domain );
}
}
}

This function can be used like this:

// Extend Jetpack, Gravity Forms, Display Posts Shortcode, Soliloquy
wps_extend_plugins( array(
'gravityforms/gravityforms.php' => '1.9',
'display-posts-shortcode/display-posts-shortcode.php' => '2.5',
'jetpack/jetpack.php' => '3.7',
'soliloquy/soliloquy.php' => '2.4.3',
), __FILE__, 'my-plugin-text-domain' )

The Class

<?php
/**
* Contains WPS_Extend_Plugin class. and wps_extend_plugins function.
*
* @package WPS_Core
* @author Travis Smith <[email protected]>
* @copyright 2015 WP Smith, Travis Smith
* @license http://opensource.org/licenses/gpl-2.0.php GNU Public License
* @version 1.0.0
* @since File available since Release 1.0.0
*/
if ( !class_exists( 'WPS_Extend_Plugin' ) ) {
/**
* Class WPS_Extend_Plugin
*
* Extends an existing plugin.
*
* @since Version 1.0.0
* @author Travis Smith <[email protected]>
*
*/
class WPS_Extend_Plugin {
/**
* Dependent plugin name, plugin relative path (e.g., 'addthis/addthis_social_widget.php' )
*
* @var string|array
*/
private $plugin = '';
/**
* Action being performed on plugins page.
*
* @var string
*/
private $action = '';
/**
* Minimum version of dependent plugin required.
* @var string
*/
private $min_version;
/**
* Reference to the current plugin's root.
* The full path and filename of the file with symlinks resolved.
*
* @var string
*/
private $root_file = __FILE__;
/**
* Text domain.
*
* @var string
*/
public $text_domain = 'wps';
/**
* Message to be displayed.
*
* @var string
*/
public $message = '';
/**
* Plugin data.
*
* @var array
*/
public $plugin_data = array();
/**
* Transient name.
*
* @var string
*/
private $transient = '';
/**
* Constructor
*
* @param string $plugin Plugin activation "slug"
* @param string $root_file Plugin basename, File reference path to root including filename.
* @param string|null $min_version Minimum version allowed.
* @param string|null $text_domain Text domain.
*/
public function __construct( $plugin, $root_file, $min_version = null, $text_domain = null ) {
// Setup
$this->plugin = $plugin;
$this->root_file = $root_file;
$this->min_version = $min_version ? $min_version : $this->min_version;
$this->text_domain = $text_domain ? $text_domain : $this->text_domain;
$this->transient = substr( 'wpsep-' . plugin_basename( $root_file ), 0, 40 );
/*
* Cannot add a notice since plugin has been deactivated
* Add notice since WP always seems to assume that the plugin was updated.
* Cannot use 'deactivate_' . $plugin hook as it does not fire if plugin is silently deactivated (such as during an update)
*/
if ( 'plugins.php' === basename( $_SERVER['PHP_SELF'] ) && ! ( defined( 'WP_CLI' ) && WP_CLI ) ) {
$this->set_action_type();
// Add admin notice
add_action( 'admin_notices', array( $this, 'admin_notice' ) );
// Late Deactivation so we can output the notifications
add_filter( 'plugin_action_links_' . $plugin, array( $this, 'plugin_action_links_maybe_deactivate' ) );
add_filter( 'network_admin_plugin_action_links_' . $plugin, array( $this, 'plugin_action_links_maybe_deactivate' ) );
// Fix Current Plugin Action Links
add_filter( 'plugin_action_links_' . plugin_basename( $root_file ), array( $this, 'plugin_action_links' ), 10, 4 );
add_filter( 'network_admin_plugin_action_links_' . plugin_basename( $root_file ), array( $this, 'plugin_action_links' ), 10, 4 );
// Add notice on Plugin Row
add_action( 'after_plugin_row_' . plugin_basename( $root_file ), array( $this, 'plugin_row' ) );
} else {
// Maybe deactivate on update of active_plugins and active_sitewide_plugins options
// deactivated_plugin action and deactivate_ . $plugin do not fire if plugin is being deactivated silently
add_action( 'update_option_active_sitewide_plugins', array( $this, 'maybe_deactivate' ), 10, 2 );
add_action( 'update_option_active_plugins', array( $this, 'maybe_deactivate' ), 10, 2 );
}
}
/**
* Conditional helper function to determine which generic action is being taken.
*
* @param string $action Action ('activate' or 'deactivate').
*
* @return bool Whether performing an activation action or deactivation action.
*/
private function is_action( $action ) {
if ( 'activate' === $action ) {
return ( 'activate' === $this->action || 'activate-multi' === $this->action );
}
if ( 'deactivate' === $action ) {
return ( 'deactivate' === $this->action || 'deactivate-multi' === $this->action );
}
return false;
}
/**
* Sets the action being taken by the plugins.php page.
*/
private function set_action_type() {
if ( isset( $_REQUEST['deactivate-multi'] ) && $_REQUEST['deactivate-multi'] ) {
$this->action = 'deactivate-multi';
} elseif ( isset( $_REQUEST['activate-multi'] ) && $_REQUEST['activate-multi'] ) {
$this->action = 'activate-multi';
} elseif ( isset( $_REQUEST['deactivate'] ) && $_REQUEST['deactivate'] ) {
$this->action = 'deactivate';
} elseif ( isset( $_REQUEST['activate'] ) && $_REQUEST['activate'] ) {
$this->action = 'activate';
}
}
/**
* Maybe fix the action links as WordPress believes the plugin is active when it may have been deactivated.
*
* @param array $actions An array of plugin action links.
* @param string $plugin_file Path to the plugin file.
* @param array $plugin_data An array of plugin data.
* @param string $context The plugin context. Defaults are 'All', 'Active',
* 'Inactive', 'Recently Activated', 'Upgrade',
* 'Must-Use', 'Drop-ins', 'Search'.
*
* @return array $actions Maybe an array of modified plugin action links.
*/
public function plugin_action_links_maybe_deactivate( $actions ) {
if ( ! $this->is_active() ) {
self::deactivate_self( $this->root_file );
}
return $actions;
}
/**
* Maybe fix the action links as WordPress believes the plugin is active when it may have been deactivated.
*
* @param array $actions An array of plugin action links.
* @param string $plugin_file Path to the plugin file.
* @param array $plugin_data An array of plugin data.
* @param string $context The plugin context. Defaults are 'All', 'Active',
* 'Inactive', 'Recently Activated', 'Upgrade',
* 'Must-Use', 'Drop-ins', 'Search'.
*
* @return array $actions Maybe an array of modified plugin action links.
*/
public function plugin_action_links( $actions, $plugin_file, $plugin_data, $context ) {
if ( ! $this->is_active() ) {
if ( isset( $actions['deactivate'] ) ) {
$params = self::get_url_params( $actions['deactivate'] );
$params = wp_parse_args( $params, array( 's' => '', ) );
unset( $actions['deactivate'] );
// Change action link deactivate to activate
$screen = get_current_screen();
if ( $screen->in_admin( 'network' ) ) {
if ( current_user_can( 'manage_network_plugins' ) ) {
/* translators: %s: plugin name */
$actions['activate'] = '<a href="' . wp_nonce_url( 'plugins.php?action=activate&amp;plugin=' . $plugin_file . '&amp;plugin_status=' . $context . '&amp;paged=' . $params['paged'] . '&amp;s=' . $params['s'], 'activate-plugin_' . $plugin_file ) . '" class="edit" aria-label="' . esc_attr( sprintf( __( 'Network Activate %s' ), $plugin_data['Name'] ) ) . '">' . __( 'Network Activate' ) . '</a>';
}
if ( current_user_can( 'delete_plugins' ) ) {
/* translators: %s: plugin name */
$actions['delete'] = '<a href="' . wp_nonce_url( 'plugins.php?action=delete-selected&amp;checked[]=' . $plugin_file . '&amp;plugin_status=' . $context . '&amp;paged=' . $params['paged'] . '&amp;s=' . $params['s'], 'bulk-plugins' ) . '" class="delete" aria-label="' . esc_attr( sprintf( __( 'Delete %s' ), $plugin_data['Name'] ) ) . '">' . __( 'Delete' ) . '</a>';
}
} else {
/* translators: %s: plugin name */
$actions['activate'] = '<a href="' . wp_nonce_url( 'plugins.php?action=activate&amp;plugin=' . $plugin_file . '&amp;plugin_status=' . $context . '&amp;paged=' . $params['paged'] . '&amp;s=' . $params['s'], 'activate-plugin_' . $plugin_file ) . '" class="edit" aria-label="' . esc_attr( sprintf( __( 'Activate %s', $this->text_domain ), $plugin_data['Name'] ) ) . '">' . __( 'Activate', $this->text_domain ) . '</a>';
if ( ! is_multisite() && current_user_can( 'delete_plugins' ) ) {
/* translators: %s: plugin name */
$actions['delete'] = '<a href="' . wp_nonce_url( 'plugins.php?action=delete-selected&amp;checked[]=' . $plugin_file . '&amp;plugin_status=' . $context . '&amp;paged=' . $params['paged'] . '&amp;s=' . $params['s'], 'bulk-plugins' ) . '" class="delete" aria-label="' . esc_attr( sprintf( __( 'Delete %s', $this->text_domain ), $plugin_data['Name'] ) ) . '">' . __( 'Delete', $this->text_domain ) . '</a>';
}
}
}
}
return $actions;
}
/**
* Outputs an admin notice if plugin is trying to be activated when dependent plugin is not activated.
*/
public function admin_notice() {
if ( ! $this->is_active() ) {
printf( '<div class="error notice is-dismissible"><p class="extension-message">%s</p></div>', $this->get_message() );
}
}
/**
* Deactivate ourself if dependent plugin is deactivated.
*
* @param mixed $old_value The old option value.
* @param mixed $value The new option value.
*/
public function maybe_deactivate( $old_value, $value ) {
if ( ! $this->is_active() ) {
self::deactivate_self( $this->root_file );
if ( defined( 'WP_CLI' ) && WP_CLI ) {
WP_CLI::error( $this->get_message( 'deactivate' ) );
}
}
}
public function recently_activated( $value, $old_value ) {
//$this->pr( $old_value, '$old_value' );
//$this->pr( $value, '$value' );
$current = array_diff_key( $value, $old_value );
//$this->pr( $current, '$current' );
//wp_die();
// Check if our plugin was just now deactivated
if ( isset( $current[ $this->plugin ] ) ) {
$this->set_transient( 'was_active', 1 );
}
return $value;
}
/**
* Returns the message to be displayed.
*
* @return string Message
*/
private function get_message() {
return $this->message;
}
/**
* Sets the message based on the needed notification type.
*
* @param string $type Notification type (deactivate, activate, update).
*/
private function set_message( $type ) {
$dependency = $this->get_plugin_data( 'Name' ) ? $this->get_plugin_data( 'Name' ) : $this->plugin;
switch ( $type ) {
case 'deactivate':
$current = $this->get_plugin_data( 'Name', 'current' ) ? $this->get_plugin_data( 'Name', 'current' ) : plugin_basename( $this->root_file );
$this->message = sprintf(
__( '%1$s (v%2$s) is required for %3$s. Deactivating %3$s.', $this->text_domain ),
$dependency,
$this->min_version,
$current
);
break;
case 'upgrade':
case 'update':
case 'activate':
default:
if ( 'update' === $type || 'upgrade' === $type || !$this->is_plugin_at_min_version() ) {
$action = 'update';
} else {
$action = 'activate';
}
$this->message = sprintf(
__( '%s (v%s) is required. Please %s it before activating this plugin.', $this->text_domain ),
$dependency,
$this->min_version,
$action
);
break;
}
}
/**
* Returns the plugin data.
*
* @param null|string $attr Specific data to return.
* @param null|string $plugin Specific plugin to return plugin_data.
*
* @return string|array Specific attribute value or all values.
*/
private function get_plugin_data( $attr = null, $plugin = null ) {
// Default to dependency plugin
if ( ! $plugin || 'dependency' === $plugin ) {
$plugin = $this->plugin;
$plugin_path = trailingslashit( plugin_dir_path( dirname( $this->root_file ) ) ) . $this->plugin;
// Allow current plugin_data to be returned
} elseif ( 'current' === $plugin ) {
$plugin = plugin_basename( $this->root_file );
$plugin_path = plugin_dir_path( dirname( $this->root_file ) ) . plugin_basename( $this->root_file );
// Un-supported plugin request, do nothing
} else {
return array();
}
// Maybe get fresh plugin_data
if ( ! isset( $this->plugin_data[ $plugin ] ) || ( isset( $this->plugin_data[ $plugin ] ) && ! $this->plugin_data[ $plugin ] ) ) {
require_once(ABSPATH . 'wp-admin/includes/plugin.php');
$this->plugin_data = get_plugin_data( $plugin_path, false, false );
}
// Maybe return specific attribute
if ( $attr && isset( $this->plugin_data[ $attr ] ) ) {
return $this->plugin_data[ $attr ];
}
// Return everything
return $this->plugin_data;
}
/**
* Returns an array of parameters from HTML markup containing a link.
*
* @param string $text HTML to be parsed.
*
* @return array Associative array of parameters and values.
*/
private static function get_url_params( $text ) {
// Capture parameters
preg_match( "/<a\s[^>]*href=\"([^\"]*)\"[^>]*>(.*)<\/a>/", $text, $output );
if ( $output ) {
preg_match_all( '/([^?&=#]+)=([^&#]*)/', html_entity_decode( urldecode( $output[1] ) ), $m );
//combine the keys and values onto an assoc array
return array_combine( $m[1], $m[2] );
}
return array();
}
/**
* Deactivates the plugin.
*
* Function attempts to determine whether to deactivate extension plugin based on whether the depdendent
* plugin is active or not.
*
* @uses deactivate_plugins Deactivate a single plugin or multiple plugins.
*
* @param string $file Single plugin or list of plugins to deactivate.
* @param mixed $network_wide Whether to deactivate the plugin for all sites in the network.
* A value of null (the default) will deactivate plugins for both the site and the
* network.
*/
public static function deactivate_self( $file, $network_wide = false ) {
if ( is_multisite() && false !== $network_wide ) {
$network_wide = is_plugin_active_for_network( $file );
}
deactivate_plugins( plugin_basename( $file ), true, $network_wide );
}
/**
* Checks whether the dependent plugin(s) is/are active by checking the active_plugins list.
*
* @return bool Whether the dependent plugin is active.
*/
public function is_active() {
$active = true;
// Check Plugin Active
if ( ! is_plugin_active( $this->plugin ) ) {
if ( $this->is_action( 'activate' ) ) {
$this->set_message( 'activate' );
} elseif ( $this->is_action( 'deactivate' ) ) {
$this->set_message( 'deactivate' );
}
return false;
}
// Plugin Active, Check Version
if ( ! $this->is_plugin_at_min_version() ) {
$this->set_message( 'update' );
return false;
}
// Maybe remove was_active transient
// if ( $active ) {
// $this->delete_transient( 'was_active' );
// }
// All Good!
return $active;
}
/**
* Determins whether the given plugin is at the minimum version.
*
* @return bool Whether the plugin is at the minimum version.
*/
private function is_plugin_at_min_version() {
if ( ! $this->min_version ) {
return true;
}
return ( floatval( $this->get_plugin_data( 'Version' ) ) >= floatval( $this->min_version ) );
}
/**
* Adds a notice to the plugin row to inform the user of the dependency.
*/
public function plugin_row() {
if ( ! $this->is_active() ) {
printf( '</tr><tr class="plugin-update-tr"><td colspan="5" class="plugin-update"><div class="update-message" style="background-color: #ffebe8;">%s</div></td>', $this->get_message() );
}
}
}
}
view raw WPS_Extend_Plugin.php hosted with ❤ by GitHub

Known Issues/To Do Item

WordPress outputs a message "Plugin reactivated successfully." regardless of whether the plugin was activated or not, since activate_plugin() does not return a Boolean response based on whether the plugin was actually activated (activate_plugin() always returns null or a WP_Error). I hope to fix this in a future revision (most likely via inline JavaScript as I want to keep everything contained within the class).

Written by Travis Smith · Categorized: Plugins

Sep 11 2015

Improving Your Time Estimates: The Fudge Ratio

Do you always feel behind in your work? Do you find yourself achieving less than you hoped fairly often? Do some projects last forever while other projects are done well and timely? Or, do you feel like the Windows progress bar?Improving Time Estimation Not Like Windows

Some people are awesome at time estimates while others are not. If you are anything like me (and I would believe many freelancers are but not including you, of course), then you have been or are really bad at estimating how much time a task or a project will take. Perhaps you estimate you’ll need about a half hour so you tell the client 1 hour to give yourself some space and time for "who knows what." When you dive into the work, you discover that it really takes you 3-4 hours to finish. Now multiply that (4x) out across an entire project (4 x 20hrs = 80hrs on the project...ouch!).
Improving Time Estimation for WordPress Developers
Or, maybe you allocate 30 minutes for a task, and you’re done in 5-10 minutes. While some may think this is great to do on purpose, eventually clients will feel like they are being exploited (or taken advantage of), and since we should strive to have integrity in our actions, even this approach is not valid. Padding our time estimates is not sustainable and most prefer not to work hourly, but understanding the amount of time it will take you is essential to improving your ability to quote projects at a flat fee and make that goal profit. How can we improve our time estimation?

This can be done with the 4 C's:

  1. Capture Your Estimations
  2. Clock your Actual Time Spent
  3. Calculate Your Fudge Ratio (or consider the Alternative)
  4. Change All Your Time Estimations

1. Capture Your Estimations

First, make a list of the tasks in your current or next project that you need to complete. This could be something like:

  • Setup local environment.
    • Create a local vagrant site
    • Create a git repository
    • Synchronize git repository
  • Setup deployment
  • Etc...

Once you have this list (and Trello makes a great place to create those lists). Next you want to write down the time estimates next to each task for how long you expect to complete each task.

2. Clock your Actual Time Spent

Next you will want to track your time. If you are not used to tracking your time, this will be a struggle. I use Freshbooks to track my time (and has an app that I use for the actual timing) and send invoices.
Freshbooks for WordPress Time Tracking

Some other timer alternatives include:

  • Klock (Cross-Platform, Adobe AIR, Free Limited)
  • Manic Time (Windows, Free)
  • Slim Timer (Web-Based, Free)
  • Rescue Time (Windows/Mac, Free)
  • Project Hamster (Linux, Free)

Using your preferred time tracker, record your time for each of the tasks that you estimated. Now, we are ready to determine our Fudge Ratio.

3. Calculate Your Fudge Ratio

The Fudge Ration was first presented by Steve Pavlina. Essentially, the fudge ratio tells use the proportion of time under/over-estimated.

The Fudge Ratio is the ratio of estimated time against actual time to complete any task.

To determine your fudge ratio, you need to do the following:

  1. Total Estimated Time: Add up the total estimated time for all your tasks
  2. Total Actual Time: Add up the total tracked time for all your tasks
  3. Create your ratio: (Total Estimated Time)/(Total Actual Time)

For example, if you estimate that a certain list of tasks will take 12 hours to complete, but they really take 15 hours, then your fudge ratio is 15/12 = 1.25. This means it took you 25% longer than expected to complete the tasks.

To determine the best ratio, it is best to have a variety of tasks over a period of time. Depending on your business, this could be done well in a half a week or a couple of months. Personally, because of the nature of being a WordPress developer, I believe we should measure a week's worth of work, and personally I would like to see the ratio over the span of two or three projects. You could also do different fudge ratios on a per project basis. For example, you could have a fudge ratio for creating a theme, a fudge ratio for creating plugins, a fudge ratio for doing SEO/marketing work, and a fudge ratio for support requests.

Change All Your Time Estimations

Obviously, the first thing we do is that we use this ratio to "fix" our estimates to our clients. This means being patient and instead of blurting out that it will only take you an hour. It is thinking, "I believe this will take me an hour but my fudge ratio is 2.0, so I am going to say 2 hours," and then communicating that thought to the client. Besides using the ratio to help improve your time estimates, I have also tried (sometimes well, sometimes poorly) to apply some other principles. Namely:

  • Pause. Everyone's project is urgent. But like entertainment parks and water parks, we all rush to get into line and wait. There is a careful balance between understanding the importance of urgency and allowing the client's schedule to dictate yours. Pausing and waiting allows you to think about the tasks/project at hand and for them to sink-in and your mind to mull over it to see if anything else "pops" into my mind (like those tasks that I forgot about).
  • Collaborate. The WordPress community does a great job helping one another. Most of us are more than willing to listen to projects and ideas and approaches to the project as a sounding board without expecting that we will be asked or contracted to do work. So, with projects that have elements that you may be unsure about, run the project by someone else.

The second thing is to apply the ratio to other parts of your business. Steve Pavlina remarks that his fudge ratio was 1.5 and because of this, he only allots for "5 hours and 20 minutes worth of tasks" daily. This idea was revolutionary for me. I easily thought of the basic application of the ratio to my estimates and creating/managing expectations. However, I did not consider the extended and extra benefits of applying the ratio to my daily tasks list or daily goals. Doing this prevents guilty feelings, shame, need to work more, becoming a workaholic and even self-sabotage.

An Alternative: The "Scotty" Principle

If creating a Fudge Ratio seems like too much trouble, you can rely on the simpler "Scotty Principle". According to the Urban Dictionary, it is:

(n.) The defacto gold star standard for delivering products and/or services within a projected timeframe.

The premise is simple:

  1. Calculate average required time for completion of given task.
  2. Depending on importance of task, add 25-50% additional time to original estimate.
  3. Report and commit to inflated time estimate with superiors, clients, etc.
  4. Under optimal conditions the task is completed closer to the original time estimate vs. the inflated delivery time expected by those waiting.

In actuality, Scotty always multiplied his estimates by 4!

Becoming a Miracle Worker

Written by Travis Smith · Categorized: WordPress · Tagged: Estimates

Sep 10 2015

Using Git for Beginners: Github for Desktop

As I have mentioned in my introductory two posts, Using Version Control and My Development Workflow, I use Git in my development. This post will focus on using Github for Windows GUI with lots (maybe too many) images (I prefer images because I am typically too impatient to watch videos). Github for Desktop is the first of three posts that I will walk-through and demonstrate. I personally have never used Github for Desktop but I know a few people that do. The primary reasons I never used it are twofold: (1.) by default the repositories are public and (2.) I was too cheap to pay for the private repositories.

As I mentioned and in way of review, I am going to share how to use Git with 3 different methods:

  1. Github Desktop
  2. Bitbucket's SourceTree
  3. TortoiseGit

Summary

To use Github for Deskotp, we will take these steps:

  1. Install Github for Desktop
  2. Setup Github for Desktop
  3. Create the Github Repository (Repo)
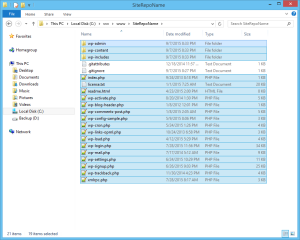
  4. Add WordPress
  5. Remove Default WordPress Themes (this step is only for Genesis developers)
  6. Add Genesis & Genesis Sample to the Github Repo
  7. Begin Development with Git
    1. Change Genesis Constants (functions.php)
    2. Publish Github Repo
    3. Change Theme Details (style.css)
    4. Sync Github Repo
  8. Reverting with Github

Using Github for Desktop

1. Install Github for Desktop

To install Github for desktop, download the installation file from Github. On the Security Warning, click Install. This will download the full installation file and install the program.

Install Github
Install Github

After installing the program, you will need to setup Github for Desktop.

2. Setup Github for Desktop

To setup Github for Desktop, you first need to enter your Github credentials. If you have not already, create a Github account. Even if you do not plan to use Github for your site development, it is good to have a Github account for entering issues with plugins and various other libraries and repositories that you may use. If you already have a Github account, skip to Step 2.3: Complete Setup.

Setup Github for Desktop

2.1 Create Github Account

To create a Github account, go to Github:

  1. Enter a username
  2. Enter your email
  3. Create your password
  4. Click Sign up for Github

Create Github Account

2.2 Select Plan

After the intial form, you will be asked to select a plan. If you want to use the free plan, just click on Finish sign up.

Create Github Account

2.3 Complete Setup

The first time you run Github, you will need to setup Github for Desktop.

  1. Login: To create the Github repo, enter your Github account information and click on Log in.
  2. Configure: Here you will enter your name (public) and email (public) and click on Continue.
  3. Then it will search for your repositories. Either wait for it or click on Skip, which is what I did.

Then you will be brought to the tutorial screen, and now you are ready to create the Github Repository.

3. Create the Github Repository (Repo)

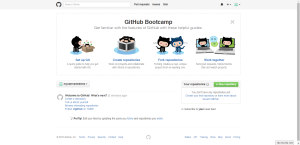
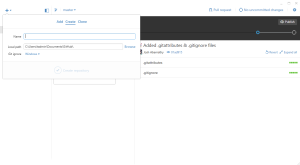
Create Github Repo
Create Github Repo
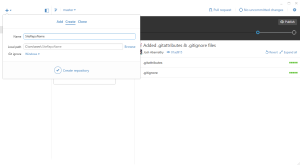
Create Github Repo
Create Github Repo
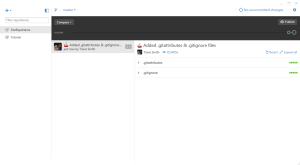
Create Github Repo

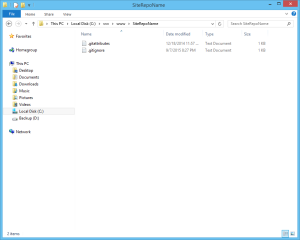
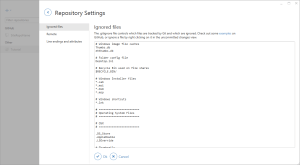
This will create .gitattributes (which you should not worry about at this time) and .gitignore.

# Windows image file caches
Thumbs.db
ehthumbs.db
# Folder config file
Desktop.ini
# Recycle Bin used on file shares
$RECYCLE.BIN/
# Windows Installer files
*.cab
*.msi
*.msm
*.msp
# Windows shortcuts
*.lnk
# =========================
# Operating System Files
# =========================
# OSX
# =========================
.DS_Store
.AppleDouble
.LSOverride
# Thumbnails
._*
# Files that might appear on external disk
.Spotlight-V100
.Trashes
# Directories potentially created on remote AFP share
.AppleDB
.AppleDesktop
Network Trash Folder
Temporary Items
.apdisk
view raw .gitignore hosted with ❤ by GitHub

If you would like, please feel free to replace/merge the .gitignore with one of the WordPress .gitignore files (.gitignore versions WordPress, .gitignore does not versions WordPress)).
Github Repository Settings

4. Add WordPress to the Github Repo

Next you would either clone WordPress from Github, download it from WordPress.org, check it out of the WordPress SVN, or ideally use your own copy with your default themes and plugins already packaged with it.

Add WordPress
Add WordPress
Add WordPress

These next two steps are for Genesis developers specifically where we will remove the default WordPress themes and add the Genesis themes.

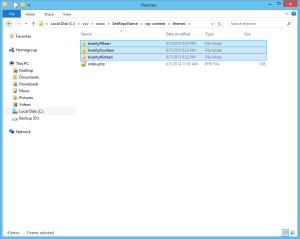
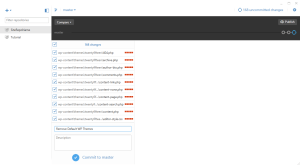
5. Remove the Default WP Themes from the Github Repo

If you do not have a pre-packaged WordPress with Genesis and your child theme, then you will want to remove the WordPress default themes.

Remove Default WP Themes

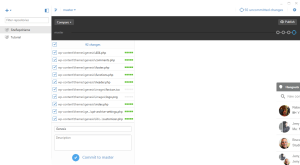
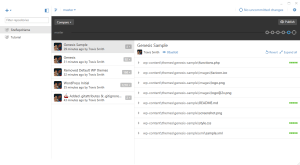
6. Add Genesis & Genesis Sample to the Github Repo

Next we want to add our Genesis theme and our default Genesis child theme, in this case, the Genesis Sample.

Add Genesis & Genesis Sample

7. Begin Development

Now, we are ready to begin development. To begin with, we have this functions.php file.

<?php
//* Start the engine
include_once( get_template_directory() . '/lib/init.php' );
//* Child theme (do not remove)
define( 'CHILD_THEME_NAME', 'Genesis Sample Theme' );
define( 'CHILD_THEME_URL', 'http://www.studiopress.com/' );
define( 'CHILD_THEME_VERSION', '2.1.2' );
//* Enqueue Google Fonts
add_action( 'wp_enqueue_scripts', 'genesis_sample_google_fonts' );
function genesis_sample_google_fonts() {
wp_enqueue_style( 'google-fonts', '//fonts.googleapis.com/css?family=Lato:300,400,700', array(), CHILD_THEME_VERSION );
}
//* Add HTML5 markup structure
add_theme_support( 'html5', array( 'search-form', 'comment-form', 'comment-list' ) );
//* Add viewport meta tag for mobile browsers
add_theme_support( 'genesis-responsive-viewport' );
//* Add support for custom background
add_theme_support( 'custom-background' );
//* Add support for 3-column footer widgets
add_theme_support( 'genesis-footer-widgets', 3 );
view raw functions1.php hosted with ❤ by GitHub

Now, we want to make a few modifications:

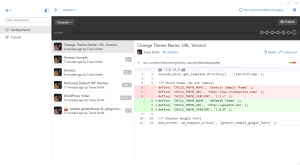
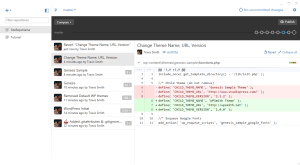
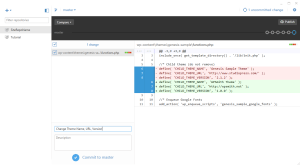
7.1 Change Genesis Constants

The first thing I usually do is change my constants.

//* Child theme (do not remove)
define( 'CHILD_THEME_NAME', 'WPSmith Theme' );
define( 'CHILD_THEME_URL', 'http://wpsmith.net' );
define( 'CHILD_THEME_VERSION', '1.0.0' );

Git Development
Git Development
Git Development

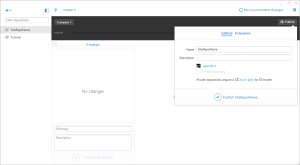
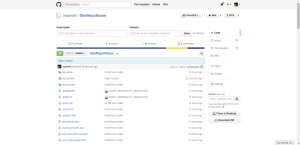
7.2 Publish the Github Repo

This is usually when I would publish the repository with Github. Now publishing the git repository in Github only creates the repository. It does not push the existing files or commits. This can be done earlier, but I tend to hold this off until this point. Sometimes I would do it before the Genesis constants change, sometimes much after. It really depends on you.

Publish Github Repository

7.3 Change style.css

Next, I change my style.css to match. At first, I have this with my CSS:

/* # Genesis Sample Child Theme
Theme Name: Genesis Sample Theme
Theme URI: http://my.studiopress.com/themes/genesis/
Description: This is the sample theme created for the Genesis Framework.
Author: StudioPress
Author URI: http://www.studiopress.com/
Template: genesis
Template Version: 2.1.2
Tags: black, orange, white, one-column, two-columns, three-columns, left-sidebar, right-sidebar, responsive-layout, custom-menu, full-width-template, rtl-language-support, sticky-post, theme-options, threaded-comments, translation-ready
License: GPL-2.0+
License URI: http://www.gnu.org/licenses/gpl-2.0.html
*/

After personalizing style.css, I now have this:

/* # WP Smith
Theme Name: WP Smith
Theme URI: http://wpsmith.net/
Description: Sample Child Theme Git Process.
Author: WP Smith
Author URI: http://wpsmith.net/
Template: genesis
Template Version: 1.0.0
Tags: black, orange, white, one-column, two-columns, three-columns, left-sidebar, right-sidebar, responsive-layout, custom-menu, full-width-template, rtl-language-support, sticky-post, theme-options, threaded-comments, translation-ready
License: GPL-2.0+
License URI: http://www.gnu.org/licenses/gpl-2.0.html
*/

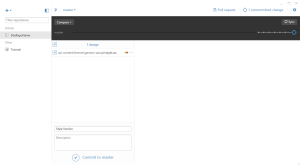
7.4 Sync the Github Repo

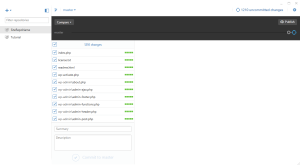
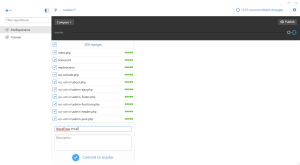
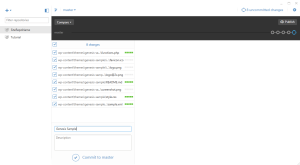
Then, I commit those changes and sync the repository.

Publish Github Repository

So now you should be familiar with basic Github for Desktop usage. Next, I will briefly show how to revert files.

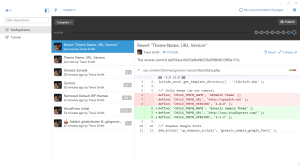
Reverting with Github

Here is how you can revert changes and track those changes with Git commits. Click on the Revert at the top right.

Revert Git Changes with Commit

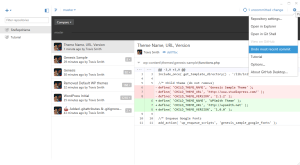
Here is how you can revert changes and not track those changes with Git. Click the gear/cog icon at the top right and click on "Undo most recent commit"

Revert Git Changes
Revert Git Changes

Conclusion

We have reviewed general usage of Github for Desktop. For your convenience, this is what we covered:

  1. Install Github for Desktop
  2. Setup Github for Desktop
  3. Create the Github Repository (Repo)
  4. Add WordPress
  5. Remove Default WordPress Themes (this step is only for Genesis developers)
  6. Add Genesis & Genesis Sample to the Github Repo
  7. Begin Development with Git
    1. Change Genesis Constants (functions.php)
    2. Publish Github Repo
    3. Change Theme Details (style.css)
    4. Sync Github Repo
  8. Reverting with Github

Written by Travis Smith · Categorized: Genesis

Sep 08 2015

Using Git for Beginners: Installing PuTTy

As I have mentioned in my previous two posts, Using Version Control and My Development Workflow, I use Git in my development.

This post will begin to demonstrate how to setup Git and various Git GUIs for using Git and how I first learned it. The problem most people have with using is that it uses the command line and for many practical, non-developer types, this is a complete turn-off, but I am going to show you how to use Git with three GUI applications:

  1. Github for Desktop
  2. Bitbucket's SourceTree
  3. TortoiseGit

First, if you are using Windows, you must download and install PuTTy (v0.65 Installer Download). Now this is no longer required for Github for Desktop, but it is essential for SSH keys.

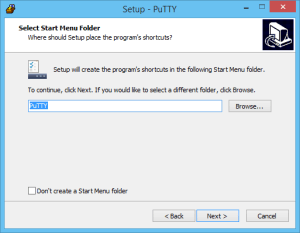
Install PuTTy

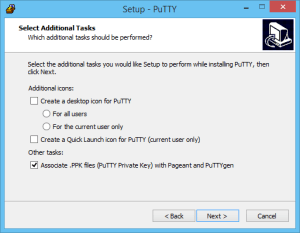
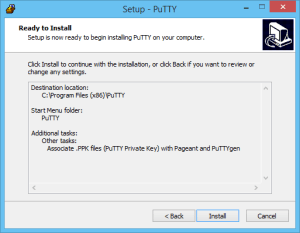
To install PuTTy click Next/Ok through everything.

Install PuTTy
Install PuTTy
Install PuTTy
Install PuTTy
Install PuTTy
Install PuTTy

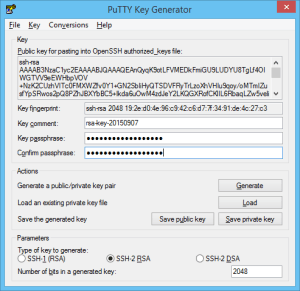
Run PuTTy Key Generator (Open PuTTyGen)

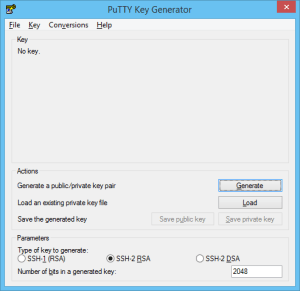
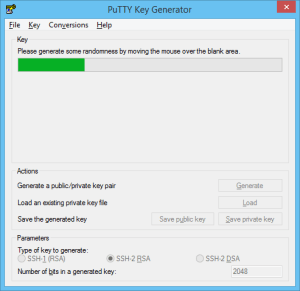
First, click Generate to begin creating a SSH key. Next, move your mouse around in the box to create the key.

PuTTyGen Create Key
PuTTyGen Create Key

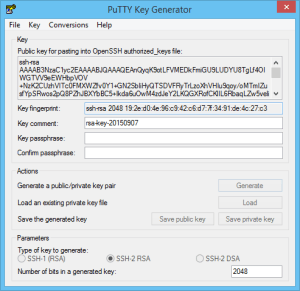
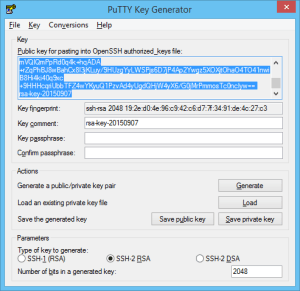
After creating the key, highlight the key created and save the key as id_rsa. Then add a passcode and save the private and public keys as id_rsa.ppk and id_rsa.pub. These need to be saved into your .ssh folder (on Windows, C:\Users\USERNAME\.ssh).

PuTTyGen SSH Key
PuTTyGen SSH Key
PuTTyGen SSH Key

ssh-rsa AAAAB3NzaC1yc2EAAAABJQAAAQEAnQyqK9otLFVMEDkFmiGU9LUDYU8TgLf4OIWGTVV9eEWHbpVOV+NzK2CUzhVITc0FMXWZfv0Y1+GN2SbIiHyQTSDVFRyTrLzoXhVHIu9qoy/oMTmIZusfYpSRwos2pQ8PZhJBXYbBC5+Ikda6uOwM4zdJeY2LKQGXRofCKlIL6RbaqLZw5velimVQIQmPpRd0q4k+hqADA+rZqPhBJ8wBahCx8I3jKLuy/9HUzgYyLWSPjs6D7jP4Ap2Ywgz5XOXjtOhaO4TO41nwiB8Hi4ki40q9xc+9HHHcqriUbbTFZ4wYKyuQ1PzvAd4yUgdQHjW4yX6/G0jMrPmmosTc0ncIyw== rsa-key-20150907
view raw id_rsa hosted with ❤ by GitHub
PuTTY-User-Key-File-2: ssh-rsa
Encryption: aes256-cbc
Comment: rsa-key-20150907
Public-Lines: 6
AAAAB3NzaC1yc2EAAAABJQAAAQEAnQyqK9otLFVMEDkFmiGU9LUDYU8TgLf4OIWG
TVV9eEWHbpVOV+NzK2CUzhVITc0FMXWZfv0Y1+GN2SbIiHyQTSDVFRyTrLzoXhVH
Iu9qoy/oMTmIZusfYpSRwos2pQ8PZhJBXYbBC5+Ikda6uOwM4zdJeY2LKQGXRofC
KlIL6RbaqLZw5velimVQIQmPpRd0q4k+hqADA+rZqPhBJ8wBahCx8I3jKLuy/9HU
zgYyLWSPjs6D7jP4Ap2Ywgz5XOXjtOhaO4TO41nwiB8Hi4ki40q9xc+9HHHcqriU
bbTFZ4wYKyuQ1PzvAd4yUgdQHjW4yX6/G0jMrPmmosTc0ncIyw==
Private-Lines: 14
mtC/XleGfOiSHm2h9OqoB0Z3PSwa1pjHk4sUG5OHovbkQrZzuJz2YLsl+Ix14slf
NhOI5+7OzsjtOJNIWGYYDMVHrasWSHStS+KDXWnjqV9AgO/C5fnRWUN7aBo4h9td
bcgdOJzuLLibnt90Jp9irHYXK1Vq8yASfomC4Pbfq/KexkBXiE45iv3v30RNW3rE
zF6FqKhzZ7L/fnW+L22YRnToOaEP2QFb/B1+BXr5sTGOqaukJbTNA5PCQzIf9QZg
l79sVwewwZnXhbJfAgLf8fVV9tsesKOru08nefHzJDOnwZckIujNtoPHOGnn0MJb
pzzngikojZHjIXpdawEvS6mh0tYyi97PlEABBUwN7Fs8pNLAF2/2V8CJaFvgTq6B
gDFFkd2B/Z5fud9Ipc8lWJGkEgMZ7gDJg1ghgXyM15PlksVMY5nhJKdpSWJhF8Si
ceAqgL9SdYraFCYc8W22XVIBWuLaR9IRnPS4rvN/deBlzq6hpdpYKCVfv7dljKeF
CzsjCYGnRg6XNOXv9T13SQEZ9eELXSJPs1tW71FEI2oxYTvn/lWywcodCPoVyOn/
06NuSdfvSnVALf+dhamAzSDwU42eeZ5PkjNa1KerkH+5WrvE4UnqXeKhVdIkSzQG
XOoI2nNbaqHFBV1zLECkfMUXtXfO726qIvWtB3ApS45MKZ/ER5tyBHxR+17EFKVr
dee8UnyDJTpmawTjnw5WMRRZi89BdEboI3qdWskS2ny4IjiU1wgp7qE6C/Xit6Uj
5x59PhBdEzESyX5gwZL2eU2MtgUIiQurh61r0a1Yry7zLn0CUwldv+UWHPea27Lq
BvaUkFfAjDv7F+/lYWxxkrWae0pjvpXGKQyZ0r2p+BTZn7io7I3aIKXmZrI7qdbm
Private-MAC: f925384bc99b17b93358ebdbc2b9945d202bcbe8
view raw id_rsa.ppk hosted with ❤ by GitHub
---- BEGIN SSH2 PUBLIC KEY ----
Comment: "rsa-key-20150907"
AAAAB3NzaC1yc2EAAAABJQAAAQEAnQyqK9otLFVMEDkFmiGU9LUDYU8TgLf4OIWG
TVV9eEWHbpVOV+NzK2CUzhVITc0FMXWZfv0Y1+GN2SbIiHyQTSDVFRyTrLzoXhVH
Iu9qoy/oMTmIZusfYpSRwos2pQ8PZhJBXYbBC5+Ikda6uOwM4zdJeY2LKQGXRofC
KlIL6RbaqLZw5velimVQIQmPpRd0q4k+hqADA+rZqPhBJ8wBahCx8I3jKLuy/9HU
zgYyLWSPjs6D7jP4Ap2Ywgz5XOXjtOhaO4TO41nwiB8Hi4ki40q9xc+9HHHcqriU
bbTFZ4wYKyuQ1PzvAd4yUgdQHjW4yX6/G0jMrPmmosTc0ncIyw==
---- END SSH2 PUBLIC KEY ----
view raw id_rsa.pub hosted with ❤ by GitHub

Written by Travis Smith · Categorized: WordPress · Tagged: Git

  • « Previous Page
  • 1
  • 2
  • 3
  • 4
  • 5
  • …
  • 60
  • Next Page »

Need Help?

Please let us know how we can help you!

Get Help

Recommendations

Genesis WordPress Framework
Sucuri Security
Gravity Forms
GetSoliloquy
Get Envira
Scribe SEO
BackupBuddy
WordPress Video User Manuals

Recent Posts

  • Solving WordPress 5XX Server Errors on SiteGround
  • Hiding an User in the WordPress Admin
  • Custom Rewrite Rules for Custom Post Types and Taxonomies
  • WordPress JavaScript Manager Native Functions
  • Causes of WordPress Site Performance Slowdown

About Travis

As a WordPress enthusiast, developer, and speaker, Travis writes about what he learns in WordPress trying to help other WordPress travelers, beginners and enthusiasts with tutorials, explanations, & demonstrations.

  • Twitter
  • Facebook
  • LinkedIn
  • Google+
  • RSS

Copyright © 2025 � WP Smith on Genesis on Genesis Framework � WordPress � Log in