WP Smith

Creating WordPress & Genesis Websites Since 2010

  • Home
  • About
  • Services
  • Blog
  • Contact

Jan 05 2012

Developing a Custom Post Type and a Custom Taxonomy in Genesis with Custom Pages, Part 4

Now, in Developing a Custom Post Type and a Custom Taxonomy in Genesis with Custom Pages, Part 1, we have the registration of the custom post type, custom taxonomy and the addition of the metaboxes. In Part 2, we discussed the Single Page Template for the custom post type. In Part 3, we discussed the Taxonomy Template for the custom taxonomy. For good measure, let's create a basic page template to wrap this all up. This will create a front page of sorts for the custom taxonomy and the single custom post type pages.

A. File Setup

First, create the file as page-{whatever}.php (WordPress Codex). While you can use page-{slug}.php, this can cause some unexpected issues. So naming it page-{whatever}.php forces the user to assign it via the page templates area. So in our case, it will be page-brakes.php.

B. Template Name

The first thing you must enter with any page template is the Template Name.
[php]<?php
/*
*Template Name: Disc Brakes Template
*/
[/php]

B. Menu Move

Now, for this example, I want to use a menu system. So I will be using the secondary menu system to accomplish this, and I want this to appear below the title.

[php]<?php
// Place the secondary navigation menu below the title
remove_action( 'genesis_after_header', 'genesis_do_subnav' );
add_action( 'genesis_after_post_title', 'genesis_do_subnav' );

// Enable the secondary navigation menu for single post type
add_filter('genesis_options', 'wps_define_genesis_setting' , 10, 2);
function wps_define_genesis_setting( $options, $setting ) {
if( $setting == GENESIS_SETTINGS_FIELD ) {
$options['subnav'] = 1;
}
return $options;
}
[/php]

If you notice, I programmatically turn on the secondary menu. However, again, in Genesis > Theme Settings, site-wide, I have the secondary navigation system turned off. Now, for this page template, I have selectively turned it on.

If you use the secondary navigation for your site, simply register a new navigation system and then add it. See the previous tutorial for this information.

C. Include the Genesis Framework **VERY IMPORTANT

[php]<?php
genesis();
[/php]

So here is our finished product: page-brakes.php
[php]
<?php

/*
*Template Name: Disc Brakes Template
*/

// Place the secondary navigation menu below the title
remove_action( 'genesis_after_header', 'genesis_do_subnav' );
add_action( 'genesis_after_post_title', 'genesis_do_subnav' );

// Enable the secondary navigation menu for single post type
add_filter('genesis_options', 'wps_define_genesis_setting' , 10, 2);
function wps_define_genesis_setting( $options, $setting ) {
if( $setting == GENESIS_SETTINGS_FIELD ) {
$options['subnav'] = 1;
}
return $options;
}

genesis();
[/php]
Written by Travis Smith · Categorized: Custom Post Types, Genesis

Jan 04 2012

Developing a Custom Post Type and a Custom Taxonomy in Genesis with Custom Pages, Part 3

In the first tutorial, Developing a Custom Post Type and a Custom Taxonomy in Genesis with Custom Pages, Part 1, we covered the following:

  1. Register your Custom Post Type
  2. Register your Custom Taxonomy
  3. Create my Metaboxes
  4. Clear Permalinks

In the previous tutorial Developing a Custom Post Type and a Custom Taxonomy in Genesis with Custom Pages, Part 2, we covered how to Create the Single Page Template for the Custom Post Type.

In this tutorial, we will walk through how to Create a Custom Taxonomy Page Template. Now the specifics will be different from custom taxonomy to custom taxonomy. This is how a taxonomy archives will appear, just like if someone clicks on a specific category or tag (via category.php). However, I will walk you through a basic setup.

A. File Setup

First, create the file as taxonomy-{taxonomy_registered_name}.php (WordPress Codex). So in our case, it will be single-wps_axlesizes.php.

B. Menu Move

Now, for this example, I want to use a menu system. So I will be using the secondary menu system to accomplish this, and I want this to appear below the title. (**This assumes that your site hasn't done anything with Secondary Navigation.)

[php]<?php
// Place the secondary navigation menu below the title
remove_action( 'genesis_after_header', 'genesis_do_subnav' );
add_action( 'genesis_after_post_title', 'genesis_do_subnav' );

// Enable the secondary navigation menu for single post type
add_filter('genesis_options', 'wps_define_genesis_setting' , 10, 2);
function wps_define_genesis_setting( $options, $setting ) {
if( $setting == GENESIS_SETTINGS_FIELD ) {
$options['subnav'] = 1;
}
return $options;
}
[/php]

If you notice, I programmatically turn on the secondary menu. However, in Genesis > Theme Settings, sitewide, I have the secondary navigation system turned off. Now, for this page template, I have selectively turned it on.

If you already use the secondary navigation for your site, simply register a new additional navigation system and then add it. See the previous tutorial for this information.

C. Post Meta/Post Info

Now, I would like to remove the post meta and post info. (**This assumes that your site hasn't done anything with Secondary Navigation.
[php]<?php
// Remove the post info function
remove_action( 'genesis_before_post_content', 'genesis_post_info' );

// Remove the post meta function
remove_action( 'genesis_after_post_content', 'genesis_post_meta' );
[/php]

D. Custom Loop **VERY IMPORTANT

Now, I want to create my custom display of the content via the loop. This section will dramatically change from custom taxonomy to custom taxonomy based on what type of information you'd like to display and how you'd like to display it. This would be where you would introduce the Genesis Grid Loop, if you wanted to go that route. Since this file refers to all the terms in the custom taxonomy, we have to code thinking about them all.

[php]<?php
remove_action('genesis_loop', 'genesis_do_loop');
add_action('genesis_loop', 'wps_do_axlesizes_loop');
function wps_do_axlesizes_loop() {
global $query_args; // any wp_query() args

// Get term
$term = get_query_var( 'term' );

$args = array(
'tax_query' => array(
array(
'taxonomy' => 'wps_axlesizes',
'field' => 'slug',
'terms' => $term
)
)
);

genesis_custom_loop( wp_parse_args( $query_args , $args ) );
}[/php]

E. Custom Content **VERY IMPORTANT

Finally, I want to create my custom display of the content via the content. Again, this section will dramatically change from custom taxonomy to custom taxonomy based on what type of information you'd like to display and how you'd like to display it.

[php]<?php
remove_action('genesis_post_content', 'genesis_do_post_content');
add_action('genesis_post_content', 'wps_do_axlesizes_content');
function wps_do_axlesizes_content() {
global $post;

$size = 'thumbnail'; // Change this to whatever add_image_size you want
$default_attr = array(
'class' => "alignleft attachment-$size",
'alt' => $post->post_title,
'title' => $post->post_title,
);

// check if the post has a Post Thumbnail assigned to it.
if ( has_post_thumbnail() ) {
printf( '<a href="%s" title="%s">%s</a>', get_permalink(), the_title_attribute( 'echo=0' ), genesis_get_image( array( 'size' => $size, 'attr' => $default_attr ) ) );
}

the_content( __( '[Read more...]' , 'genesis' ) );

printf( '<a href="%s" title="%s">%s</a>', get_permalink(), the_title_attribute( 'echo=0' ), __( 'click for specifications' ) );

echo '<div class="clear"></div>';
}[/php]

Now, for SEO purposes, we wanted to include the page name that will be associated with

tags.
// Add a page title (optional). This can be hard coded to pull the title from a specific page, but it is easier just to enter the page name here.
[php]<?php
add_action( 'genesis_before_content' , 'wps_page_title' , 10 );
function wps_page_title() {
?>
<h1>Disc Brake Kits</h1>
<?php
}
[/php]

F. Include the Genesis Framework **VERY IMPORTANT

[php]<?php
genesis();
[/php]

The next step would be to style the taxonomy archive accordingly and as needed, which I am not going to cover here.

So our finished product is this: single-wps_axlesizes.php
[php]
<?php
/**
* Taxonomy Template: wps_axlesizes
*
* This file is responsible for the display of
* taxonomy archives for wps_axlesizes custom taxonomy.
*
* @author Travis Smith <[email protected]>
* @copyright Copyright (c) 2011, Travis Smith
* @license http://opensource.org/licenses/gpl-2.0.php GNU Public License
*
*/

// Place the secondary navigation menu below the title
remove_action( 'genesis_after_header', 'genesis_do_subnav' );
add_action( 'genesis_after_post_title', 'genesis_do_subnav' );

// Enable the secondary navigation menu for single post type
add_filter('genesis_options', 'wps_define_genesis_setting' , 10, 2);
function wps_define_genesis_setting( $options, $setting ) {
if( $setting == GENESIS_SETTINGS_FIELD ) {
$options['subnav'] = 1;
}
return $options;
}

// Remove the post info function
remove_action( 'genesis_before_post_content', 'genesis_post_info' );

// Remove the post meta function
remove_action( 'genesis_after_post_content', 'genesis_post_meta' );

remove_action('genesis_loop', 'genesis_do_loop');
add_action('genesis_loop', 'wps_do_axlesizes_loop');
function wps_do_axlesizes_loop() {
global $query_args; // any wp_query() args

// Get term
$term = get_query_var( 'term' );

$args = array(
'tax_query' => array(
array(
'taxonomy' => 'wps_axlesizes',
'field' => 'slug',
'terms' => $term
)
)
);

genesis_custom_loop( wp_parse_args( $query_args , $args ) );
}

remove_action('genesis_post_content', 'genesis_do_post_content');
add_action('genesis_post_content', 'wps_do_axlesizes_content');
function wps_do_axlesizes_content() {
global $post;

$size = 'thumbnail'; // Change this to whatever add_image_size you want
$default_attr = array(
'class' => "alignleft attachment-$size",
'alt' => $post->post_title,
'title' => $post->post_title,
);

// check if the post has a Post Thumbnail assigned to it.
if ( has_post_thumbnail() ) {
printf( '<a href="%s" title="%s">%s</a>', get_permalink(), the_title_attribute( 'echo=0' ), genesis_get_image( array( 'size' => $size, 'attr' => $default_attr ) ) );
}

the_content( __( '[Read more...]' , 'genesis' ) );

printf( '<a href="%s" title="%s">%s</a>', get_permalink(), the_title_attribute( 'echo=0' ), __( 'click for specifications' ) );

echo '<div class="clear"></div>';
}

add_action( 'genesis_before_content' , 'rdwd_page_title' , 10 );
function rdwd_page_title() {
?>
<h1>Disc Brake Kits</h1>
<?php
}

genesis();
[/php]

Written by Travis Smith · Categorized: Custom Post Types, Genesis

Jan 03 2012

Developing a Custom Post Type and a Custom Taxonomy in Genesis with Custom Pages, Part 2

In the previous tutorial, Developing a Custom Post Type and a Custom Taxonomy in Genesis with Custom Pages, Part 1, we covered the following:

  1. Register your Custom Post Type
  2. Register your Custom Taxonomy
  3. Create my Metaboxes
  4. Clear Permalinks

Now that we have registered our custom post type and taxonomy and created our custom metabox, we will work on displaying them using a custom page template. In this tutorial, we will walk through how to Create the Single Page Template for the Custom Post Type. Note that this will be different from custom post type to custom post type. This is how a single post inside the custom post type will appear. However, I will walk you through a basic setup.

A. File Setup

First, create the file as single-{cpt_registered_name}.php (WordPress Codex). So in our case, it will be single-wps_discbrakes.php.

B. Menu Move

Now, for this example, I want to use a menu system. So I will be using the secondary menu system to accomplish this, and I want this to appear below the title.

[php]<?php
// Place the secondary navigation menu below the title
remove_action( 'genesis_after_header', 'genesis_do_subnav' );
add_action( 'genesis_after_post_title', 'genesis_do_subnav' );

// Enable the secondary navigation menu for single post type
add_filter( 'genesis_options', 'wps_define_genesis_setting' , 10, 2 );
function wps_define_genesis_setting( $options, $setting ) {
if( $setting == GENESIS_SETTINGS_FIELD ) {
$options['subnav'] = 1;
}
return $options;
}
[/php]

If you notice, I have programmatically turn on the secondary menu. However, in Genesis > Theme Settings, sitewide, I have the secondary navigation system turned off. Now, for this page template, I have selectively turned it on.

If you use the secondary navigation for your site, simply register a new navigation system and then add it. First, you will need to add this code to functions.php:
[php]<?php
register_nav_menu( 'tertiary', 'Tertiary Navigation Menu' );
function wps_do_subsubnav() {
if ( has_nav_menu( 'tertiary' ) ) {

$args = array(
'theme_location' => 'tertiary',
'container' => '',
'menu_class' => genesis_get_option('subnav_superfish') ? 'nav superfish' : 'nav',
'echo' => 0
);

$subsubnav = wp_nav_menu( $args );

}
$subsubnav_output = sprintf( '<div id="subsubnav">%2$s%1$s%3$s</div>', $subsubnav , genesis_structural_wrap( 'subsubnav', '<div class="wrap">', 0 ) , genesis_structural_wrap( 'subsubnav', '</div><!-- end .wrap -->' , 0 ) );
echo apply_filters( 'wps_do_subsubnav', $subsubnav_output , $subsubnav , $args );
}[/php]

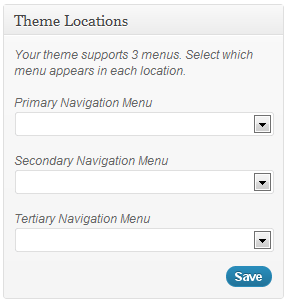
Since Genesis structural wraps do not natively extend beyond nav and subnav, you can use genesis_structural_wrap( 'subnav', '<div class="wrap">', 0 ) if you prefer. You should now see the third menu location in Appearance > Menus.

Now you may or may not (most likely not), see your new custom post types and custom taxonomies list on the left under pages and custom links.

To have your new custom post types and custom taxonomies lists appear click on screen options at the top right and select (check) the custom post type and custom taxonomy.
Menu Screen Options 1

Menu Screen Options 2

Then you would add the following to the single template:
[php]<?php
remove_action( 'genesis_after_header', 'genesis_do_subnav' );
add_action( 'genesis_after_post_title', 'wps_do_subsubnav' );
[/php]

C. POST META/POST INFO

Now, I would like to remove the post meta and post info.
[php]<?php
// Remove the post info function
remove_action( 'genesis_before_post_content', 'genesis_post_info' );

// Remove the post meta function
remove_action( 'genesis_after_post_content', 'genesis_post_meta' );
[/php]

D. Custom Content **VERY IMPORTANT

Finally, I want to create my custom display of the content. This section will dramatically change from custom post type to custom post type based on what type of information you'd like to display and how you'd like to display it.

[php]<?php
remove_action( 'genesis_post_content', 'genesis_do_post_content' );
add_action( 'genesis_post_content', 'wps_do_diskbrakes_content' );
function wps_do_diskbrakes_content() {
global $post;

//setup thumbnail image args to be used with genesis_get_image();
$size = 'full'; // Change this to whatever add_image_size you want
$default_attr = array(
'class' => "aligncenter attachment-$size",
'alt' => $post->post_title,
'title' => $post->post_title,
);

// check if the post has a Post Thumbnail assigned to it. You can delete the if conditional if you want and assume that there will always be a thumbnail
if ( has_post_thumbnail() ) {
echo '<div class="clear"></div>';
printf( '<a href="%s" title="%s">%s</a>', get_permalink(), the_title_attribute( 'echo=0' ), genesis_get_image( array( 'size' => $size, 'attr' => $default_attr ) ) );
}
//else {} // you can add a default thumbnail conditional here if you want.

// display features from the metabox and custom fields
echo "<div class='discbrakes-features'>";
echo "<h3>Features</h3>";
echo "<ul>";
echo "<li><span class='feature-title'>Part Number:</span> <span class='feature'>" . genesis_get_custom_field( '_wps_part_number' ) . "</span></li>";
echo "<li><span class='feature-title'>Rotor:</span> <span class='feature'>" . genesis_get_custom_field( '_wps_rotor' ) . "</span></li>";
echo "<li><span class='feature-title'>Caliper:</span> <span class='feature'>" . genesis_get_custom_field( '_wps_caliper' ) . "</span></li>";
echo "<li><span class='feature-title'>Mounting Brake:</span> <span class='feature'>" . genesis_get_custom_field( '_wps_mounting_bracket' ) . "</span></li>";
echo "<li><span class='feature-title'>Weight/Axle Set:</span> <span class='feature'>" . genesis_get_custom_field( '_wps_weight_per_axle_set' ) . "</span></li>";
echo "</ul>";
echo "</div>";

// Display the content, if the content editor has content
if( $post->post_content != "" ) {
echo "<div class='discbrakes-description'>";
echo "<h3>Description</h3>";
the_content( __( '[Read more...]' , 'genesis' ) );
echo "</div>";
}
}
[/php]

E. Include the Genesis Framework **VERY IMPORTANT

[php]<?php
genesis();
[/php]

The next step would be to style the single page template accordingly and as needed.

So our finished product is this: single-wps_axlesizes.php
[php]
<?php

/**
* Single CPT Template: wps_axlesizes
*
* This file is responsible for the display of
* single posts of the custom post type wps_axlesizes.
*
* @author Travis Smith <[email protected]>
* @copyright Copyright (c) 2011, Travis Smith
* @license http://opensource.org/licenses/gpl-2.0.php GNU Public License
*
*/

// Place the secondary navigation menu below the title
remove_action( 'genesis_after_header', 'genesis_do_subnav' );
add_action( 'genesis_after_post_title', 'genesis_do_subnav' );

// Enable the secondary navigation menu for single post type
add_filter('genesis_options', 'wps_define_genesis_setting' , 10, 2);
function wps_define_genesis_setting( $options, $setting ) {
if( $setting == GENESIS_SETTINGS_FIELD ) {
$options['subnav'] = 1;
}
return $options;
}

// Remove the post info function
remove_action( 'genesis_before_post_content', 'genesis_post_info' );

// Remove the post meta function
remove_action( 'genesis_after_post_content', 'genesis_post_meta' );

remove_action( 'genesis_post_content', 'genesis_do_post_content' );
add_action( 'genesis_post_content', 'wps_do_diskbrakes_content' );
function wps_do_diskbrakes_content() {
global $post;

//setup thumbnail image args to be used with genesis_get_image();
$size = 'full'; // Change this to whatever add_image_size you want
$default_attr = array(
'class' => "aligncenter attachment-$size",
'alt' => $post->post_title,
'title' => $post->post_title,
);

// check if the post has a Post Thumbnail assigned to it. You can delete the if conditional if you want and assume that there will always be a thumbnail
if ( has_post_thumbnail() ) {
echo '<div class="clear"></div>';
printf( '<a href="%s" title="%s">%s</a>', get_permalink(), the_title_attribute( 'echo=0' ), genesis_get_image( array( 'size' => $size, 'attr' => $default_attr ) ) );
}
//else {} // you can add a default thumbnail conditional here if you want.

// display features from the metabox and custom fields
echo "<div class='discbrakes-features'>";
echo "<h3>Features</h3>";
echo "<ul>";
echo "<li><span class='feature-title'>Part Number:</span> <span class='feature'>" . genesis_get_custom_field( '_wps_part_number' ) . "</span></li>";
echo "<li><span class='feature-title'>Rotor:</span> <span class='feature'>" . genesis_get_custom_field( '_wps_rotor' ) . "</span></li>";
echo "<li><span class='feature-title'>Caliper:</span> <span class='feature'>" . genesis_get_custom_field( '_wps_caliper' ) . "</span></li>";
echo "<li><span class='feature-title'>Mounting Brake:</span> <span class='feature'>" . genesis_get_custom_field( '_wps_mounting_bracket' ) . "</span></li>";
echo "<li><span class='feature-title'>Weight/Axle Set:</span> <span class='feature'>" . genesis_get_custom_field( '_wps_weight_per_axle_set' ) . "</span></li>";
echo "</ul>";
echo "</div>";

// Display the content, if the content editor has content
if( $post->post_content != "" ) {
echo "<div class='discbrakes-description'>";
echo "<h3>Description</h3>";
the_content( __( '[Read more...]' , 'genesis' ) );
echo "</div>";
}
}

genesis();
[/php]

Written by Travis Smith · Categorized: Custom Post Types, Genesis

Jan 02 2012

Developing a Custom Post Type and a Custom Taxonomy in Genesis with Custom Pages, Part 1

Recently, someone contacted me to develop a custom post type setup for their website, and they were lamenting how there is nothing on the web that succinctly walks them through the process: soup to nuts. So here's my attempt! However, I am going to assume basic knowledge of custom post types. If you haven't read through my Understanding Custom Post Types series yet, you may want to do that.

First, I created a new php file called wps-admin-functions.php. This is where we will house our Custom Post Types, Taxonomies, and Metaboxes. We could have added this to our theme’s function.php file but this will allow us to have a separate file dedicated to our newly added features. To do this, simply create a new text document in your favorite text editor and save as wps-admin-functions.php.

1. Register your Custom Post Type

[php]<?php
// registration code for discbrakes post type
function wps_register_discbrakes_posttype() {
$labels = array(
'name' => _x( 'Disc Brakes', 'post type general name' ),
'singular_name' => _x( 'Disc Brake', 'post type singular name' ),
'add_new' => _x( 'Add New', 'Disc Brake'),
'add_new_item' => __( 'Add New Disc Brake '),
'edit_item' => __( 'Edit Disc Brake '),
'new_item' => __( 'New Disc Brake '),
'view_item' => __( 'View Disc Brake '),
'search_items' => __( 'Search Disc Brakes '),
'not_found' => __( 'No Disc Brake found' ),
'not_found_in_trash' => __( 'No Disc Brakes found in Trash' ),
'parent_item_colon' => ''
);

$supports = array( 'title' , 'editor' , 'thumbnail' , 'excerpt' , 'revisions' );

$post_type_args = array(
'labels' => $labels,
'singular_label' => __( 'Disc Brake' ),
'public' => true,
'show_ui' => true,
'publicly_queryable' => true,
'query_var' => true,
'capability_type' => 'post',
'has_archive' => true,
'hierarchical' => false,
'rewrite' => array( 'slug' => 'discbrakes' ),
'supports' => $supports,
'menu_position' => 5,
'taxonomies' => array( 'wps_axlesizes' ),
'menu_icon' => 'http://mydomain.com/wp-content/themes/lib/images/discbrakes-icon.png'
);
register_post_type( 'wps_discbrakes' , $post_type_args );
}
add_action( 'init', 'wps_register_discbrakes_posttype' );
[/php]

Notice in this code that I associate my custom post type with my coming custom taxonomy: 'taxonomies' => array( 'wps_axlesizes' ),. Also, note that I am using a prefix on both my custom post type and taxonomy. The reason this is done is that there may be a naming conflict with a plugin or other code in your theme. The prefix uniquely identifies it to prevent this. It is a best practice, and make sure you do not use the wp_ or genesis_ prefixes.

2. Register your Custom Taxonomy

[php]<?php
// registration code for AxleSizes taxonomy
function wps_register_axlesizes_tax() {
$labels = array(
'name' => _x( 'Axle Sizes', 'taxonomy general name' ),
'singular_name' => _x( 'Axle Size', 'taxonomy singular name' ),
'add_new' => _x( 'Add New Axle Size', 'Axle Size'),
'add_new_item' => __( 'Add New Axle Size' ),
'edit_item' => __( 'Edit Axle Size' ),
'new_item' => __( 'New Axle Size' ),
'view_item' => __( 'View Axle Size' ),
'search_items' => __( 'Search Axle Sizes' ),
'not_found' => __( 'No Axle Size found' ),
'not_found_in_trash' => __( 'No Axle Size found in Trash' ),
);

$pages = array( 'wps_discbrakes' );

$args = array(
'labels' => $labels,
'singular_label' => __( 'Axle Size' ),
'public' => true,
'show_ui' => true,
'hierarchical' => false,
'show_tagcloud' => false,
'show_in_nav_menus' => true,
'rewrite' => array('slug' => 'axle-sizes'),
);
register_taxonomy( 'wps_axlesizes' , $pages , $args );
}
add_action( 'init' , 'wps_register_axlesizes_tax' );[/php]

Custom Post TypeNotice in the registration, the taxonomy is associated with my custom post type: $pages = array( 'wps_discbrakes' );.

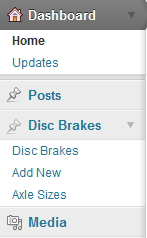
Once these are registered, you should see your custom post type to the left under POST.

3. Create my Metaboxes
With metaboxes, you can go the long way; however, I prefer to use a class. Soon WordPress will have a metabox class, hopefully in WordPress 3.3, so this section will be rendered "obsolete" yet still usable. First, download the custom metabox code from GitHub. For a great explanation of the code, see Bill Erickson's tutorial. Because of the tutorial, I won't break down this section.

Once downloaded, place the metabox folder in your lib folder in the child theme folder so that: CHILD_URL . '/lib/metabox/init.php'

So the file structure is
CHILD-THEME-FOLDER

  • IMAGES FOLDER
  • LIB FOLDER
    • METABOX FOLDER
    • IMAGES FOLDER
    • wps-admin-functions.php
  • functions.php
  • style.css
  • readme.txt

[php]<?php
// Create Metaboxes
$prefix = '_wps_';
add_filter( 'cmb_meta_boxes', 'wps_create_metaboxes' );
function wps_create_metaboxes() {
global $prefix;

$meta_boxes[] = array(
'id' => 'disk-brakes-info',
'title' => 'Disk Brakes Information',
'pages' => array( 'wps_discbrakes' ), // post type
'context' => 'normal',
'priority' => 'low',
'show_names' => true, // Show field names left of input
'fields' => array(
array(
'name' => 'Instructions',
'desc' => 'In the right column upload a featured image. Make sure this image is at least 900x360px wide. Then fill out the information below.',
'id' => $prefix . 'title',
'type' => 'title',
),
array(
'name' => 'Part Number',
'desc' => 'Enter the part number (e.g., XXXXXXX)',
'id' => $prefix . 'part_number',
'type' => 'text'
),
array(
'name' => 'Rotor',
'desc' => '',
'id' => $prefix . 'rotor',
'type' => 'select',
'options' => array(
array('name' => 'Stainless Steel', 'value' => 'stainless-steel'),
array('name' => 'E-Coat (Black)', 'value' => 'e-coat-black'),
array('name' => 'Option Three', 'value' => 'none')
)
),
array(
'name' => 'Caliper',
'desc' => '',
'id' => $prefix . 'caliper',
'type' => 'select',
'options' => array(
array('name' => 'Stainless Steel', 'value' => 'stainless-steel'),
array('name' => 'E-Coat (Black)', 'value' => 'e-coat-black'),
array('name' => 'Option Three', 'value' => 'none')
)
),
array(
'name' => 'Mounting Bracket',
'desc' => '',
'id' => $prefix . 'mounting_bracket',
'type' => 'select',
'options' => array(
array('name' => 'Stainless Steel', 'value' => 'stainless-steel'),
array('name' => 'E-Coat (Black)', 'value' => 'e-coat-black'),
array('name' => 'Option Three', 'value' => 'none')
)
),
array(
'name' => 'Weight per Axle Set',
'desc' => 'e.g., 45 LBS.',
'id' => $prefix . 'weight_per_axle_set',
'type' => 'text'
),
),
);

return $meta_boxes;
}

// Initialize the metabox class
add_action( 'init', 'be_initialize_cmb_meta_boxes', 9999 );
function be_initialize_cmb_meta_boxes() {
if ( !class_exists( 'cmb_Meta_Box' ) ) {
require_once(CHILD_DIR . '/lib/metabox/init.php');
}
}
[/php]

This will create the metaboxes for the custom post type.
Custom Post Type Metaboxes

4. Clear Permalinks
Now in your admin area, navigate to Settings > Permalinks and click Save Changes. This will flush and clear your permalinks. This is important if you are getting strange 404 Page Not Found errors.

So our finished product is this: wps-admin-functions.php

[php]
<?php

/**
* Admin Functions
*
* This file is responsible for registering the
* custom post types, taxonomies, and metaboxes.
*
* @author Travis Smith <[email protected]>
* @copyright Copyright (c) 2011, Travis Smith
* @license http://opensource.org/licenses/gpl-2.0.php GNU Public License
*
*/

// registration code for discbrakes post type
function wps_register_discbrakes_posttype() {
$labels = array(
'name' => _x( 'Disc Brakes', 'post type general name' ),
'singular_name' => _x( 'Disc Brake', 'post type singular name' ),
'add_new' => _x( 'Add New', 'Disc Brake'),
'add_new_item' => __( 'Add New Disc Brake '),
'edit_item' => __( 'Edit Disc Brake '),
'new_item' => __( 'New Disc Brake '),
'view_item' => __( 'View Disc Brake '),
'search_items' => __( 'Search Disc Brakes '),
'not_found' => __( 'No Disc Brake found' ),
'not_found_in_trash' => __( 'No Disc Brakes found in Trash' ),
'parent_item_colon' => ''
);

$supports = array( 'title' , 'editor' , 'thumbnail' , 'excerpt' , 'revisions' );

$post_type_args = array(
'labels' => $labels,
'singular_label' => __( 'Disc Brake' ),
'public' => true,
'show_ui' => true,
'publicly_queryable' => true,
'query_var' => true,
'capability_type' => 'post',
'has_archive' => true,
'hierarchical' => false,
'rewrite' => array( 'slug' => 'discbrakes' ),
'supports' => $supports,
'menu_position' => 5,
'taxonomies' => array( 'wps_axlesizes' ),
'menu_icon' => 'http://mydomain.com/wp-content/themes/lib/images/discbrakes-icon.png'
);
register_post_type( 'wps_discbrakes' , $post_type_args );
}
add_action( 'init', 'wps_register_discbrakes_posttype' );

// registration code for AxleSizes taxonomy
function wps_register_axlesizes_tax() {
$labels = array(
'name' => _x( 'Axle Sizes', 'taxonomy general name' ),
'singular_name' => _x( 'Axle Size', 'taxonomy singular name' ),
'add_new' => _x( 'Add New Axle Size', 'Axle Size'),
'add_new_item' => __( 'Add New Axle Size' ),
'edit_item' => __( 'Edit Axle Size' ),
'new_item' => __( 'New Axle Size' ),
'view_item' => __( 'View Axle Size' ),
'search_items' => __( 'Search Axle Sizes' ),
'not_found' => __( 'No Axle Size found' ),
'not_found_in_trash' => __( 'No Axle Size found in Trash' ),
);

$pages = array( 'wps_discbrakes' );

$args = array(
'labels' => $labels,
'singular_label' => __( 'Axle Size' ),
'public' => true,
'show_ui' => true,
'hierarchical' => false,
'show_tagcloud' => false,
'show_in_nav_menus' => true,
'rewrite' => array('slug' => 'axle-sizes'),
);
register_taxonomy( 'wps_axlesizes' , $pages , $args );
}
add_action( 'init' , 'wps_register_axlesizes_tax' );

// Create Metaboxes
$prefix = '_wps_';
add_filter( 'cmb_meta_boxes', 'wps_create_metaboxes' );
function wps_create_metaboxes() {
global $prefix;

$meta_boxes[] = array(
'id' => 'disk-brakes-info',
'title' => 'Disk Brakes Information',
'pages' => array( 'wps_discbrakes' ), // post type
'context' => 'normal',
'priority' => 'low',
'show_names' => true, // Show field names left of input
'fields' => array(
array(
'name' => 'Instructions',
'desc' => 'In the right column upload a featured image. Make sure this image is at least 900x360px wide. Then fill out the information below.',
'id' => $prefix . 'title',
'type' => 'title',
),
array(
'name' => 'Part Number',
'desc' => 'Enter the part number (e.g., XXXXXXX)',
'id' => $prefix . 'part_number',
'type' => 'text'
),
array(
'name' => 'Rotor',
'desc' => '',
'id' => $prefix . 'rotor',
'type' => 'select',
'options' => array(
array('name' => 'Stainless Steel', 'value' => 'stainless-steel'),
array('name' => 'E-Coat (Black)', 'value' => 'e-coat-black'),
array('name' => 'Option Three', 'value' => 'none')
)
),
array(
'name' => 'Caliper',
'desc' => '',
'id' => $prefix . 'caliper',
'type' => 'select',
'options' => array(
array('name' => 'Stainless Steel', 'value' => 'stainless-steel'),
array('name' => 'E-Coat (Black)', 'value' => 'e-coat-black'),
array('name' => 'Option Three', 'value' => 'none')
)
),
array(
'name' => 'Mounting Bracket',
'desc' => '',
'id' => $prefix . 'mounting_bracket',
'type' => 'select',
'options' => array(
array('name' => 'Stainless Steel', 'value' => 'stainless-steel'),
array('name' => 'E-Coat (Black)', 'value' => 'e-coat-black'),
array('name' => 'Option Three', 'value' => 'none')
)
),
array(
'name' => 'Weight per Axle Set',
'desc' => 'e.g., 45 LBS.',
'id' => $prefix . 'weight_per_axle_set',
'type' => 'text'
),
),
);

return $meta_boxes;
}

// Initialize the metabox class
add_action( 'init', 'wps_initialize_cmb_meta_boxes', 9999 );
function wps_initialize_cmb_meta_boxes() {
if ( !class_exists( 'cmb_Meta_Box' ) ) {
require_once(CHILD_DIR . '/lib/metabox/init.php');
}
}
[/php]

Written by Travis Smith · Categorized: Custom Post Types, Genesis

Sep 29 2011

How to Include Another Post Type and Custom Taxonomy on the Genesis Blog Page

So recently, someone asked me to help them assimilate two post types on the Genesis blog page. Since because of the Genesis loops, this becomes quite easy. So here's what we need to do:

  1. Setup the Template Name
  2. Create the Custom Loop
  3. Modify the Post Meta
  4. Customize the Content Display

Setup the Template Name

First and as always, we need to set up the template. You can start by scratch, which this tutorial will do, or you can copy page_blog.php from the genesis folder.
[php]<?php
/**

Template Name: Blog

*/
[/php]

You may want to change the template name to something different so there aren't any confusions with Genesis's version. So something like this would work:
[php]<?php
/**

Template Name: Custom Blog

*/
[/php]

Create the Custom Loop

Now, I have a site with multiple custom post types and what I want to do is to combine two of those post types (post and wps_videos) into the blog feed. Then I want to limit them based on the Genesis category settings as well as incorporate the Video Category (wps_vidcats) in the same manner.

So first, I have to unhook the genesis standard loop.
[php]
remove_action('genesis_loop', 'genesis_do_loop');
[/php]

Then I add my own loop with its custom function.
[php]
add_action( 'genesis_loop', 'wps_custom_do_loop' , 5 );
function wps_custom_do_loop() {
$include = genesis_get_option( 'blog_cat' );
$exclude = genesis_get_option( 'blog_cat_exclude' ) ? explode( ',' , str_replace ( ' ' , '' , genesis_get_option( 'blog_cat_exclude' ) ) ) : '';
[/php]

These lines are right out of the Genesis standard loop. They pull the information set on the Theme Settings page and place them in variables to be used later. However, these are limited to just categories. Now, it is important to note that $include only contains one category id and $exclude contains an array of categories (even if there is only one).

Now, I need to build my $args. In my args, I want to add my post types as well as build my taxonomy query. So continuing inside wps_custom_do_loop:
[php]
$args = array(
'showposts' => genesis_get_option('blog_cat_num'),
'post_type' => array( 'post' , 'wps_videos' ),
'tax_query' => array(
'relation' => 'OR',
array(
'taxonomy' => 'wps_vidcategory',
'field' => 'id',
'terms' => array( 92 )
),
array(
'taxonomy' => 'category',
'field' => 'id',
'terms' => array( $include )
),
)
);
[/php]

So let me break this down for you. 'showposts' pulls from the Genesis Theme Settings page. 'post_type' is where we add the registered names of all the post types we would like to include in an array. 'tax_query' is where I limit the query based on my requirements. Now I wanted to only include posts from one category, which was set on the Genesis Theme Settings page, and I also wanted to do likewise with my videos and include videos from one specific Video Category (here term ID of 92). And since posts and videos do not share the same taxonomy, the tax_query is simple. So, in summary, I wanted posts from one category ($include) OR (and that's my relation argument) posts from my custom taxonomy video category (here 92).

Now, if I wanted, I could replace the last array with a different array to allow for all categories except (again based on category ids entered in Genesis Theme Settings). It would look something like this:
[php]
$args = array(
'showposts' => genesis_get_option('blog_cat_num'),
'post_type' => array( 'post' , 'wps_videos' ),
'tax_query' => array(
'relation' => 'OR',
array(
'taxonomy' => 'wps_vidcategory',
'field' => 'id',
'terms' => array( 92 )
),
array(
'taxonomy' => 'category',
'field' => 'id',
'terms' => $exclude,
'operator' => 'NOT IN'
),
)
);
[/php]

Now, we can finish the function by calling the Genesis Custom Loop.
[php]

genesis_custom_loop( $args );
}
[/php]

So all together the function looks like this (to simply limit posts to one category and vids from another category):
[php]<?php
remove_action('genesis_loop', 'genesis_do_loop');
add_action( 'genesis_loop', 'custom_do_loop' , 5 );

function custom_do_loop() {
$include = genesis_get_option('blog_cat');
$exclude = genesis_get_option('blog_cat_exclude') ? explode(',', str_replace(' ', '', genesis_get_option('blog_cat_exclude'))) : '';
$cf = genesis_get_custom_field('query_args'); /** Easter Egg **/
$args = array(
'showposts' => genesis_get_option('blog_cat_num'),
'post_type' => array( 'post' , 'wps_videos' ),
'tax_query' => array(
'relation' => 'OR',
array(
'taxonomy' => 'wps_vidcategory',
'field' => 'id',
'terms' => array( 92 )
),
array(
'taxonomy' => 'category',
'field' => 'id',
'terms' => array( $include )
),
)
);
genesis_custom_loop( $args );
}
[/php]

Modify the Post Meta

Now, because my videos do not share the same taxonomy with posts (and it could have [dare I say, should have] but the client didn't want it that way). My posts on the blog page that are from the videos custom post type won't have any post meta. I could simply remove it, but since the client wanted it, I simply filter them.

To filter the post meta to include terms from categories and my video categories, simply do a basic if-then statement. Normally Genesis has $post_meta = '[ post_categories] [ post_tags]';. However, I wanted to change it to just display categories.
[php]<?php
/** Customize the post meta function */
add_filter( 'genesis_post_meta' , 'post_meta_filter' );
function post_meta_filter( $post_meta ) {
global $post;
if ( $post->post_type == 'wps_videos' ) {
$vid_cats = get_the_term_list( $post->ID, 'wps_vidcategory' , '' , ', ' , '' );
$post_meta = sprintf( '<span class="categories">%2$s%1$s</span> ', $vid_cats, 'Filed Under: ' );
}
else {
$post_meta = 'Filed Under: Custom Post Types, Genesis, Tutorials, WordPress';
}
return $post_meta;
}
[/php]

Customize the Content Display

Now, because of UX, the video custom post type had a metabox to make displaying the videos consistent. However, if we do nothing then the videos never appear, which is not what we want.

First, I must unhook the standard Genesis content function.
[php]
/** Customize the content */
remove_action( 'genesis_post_content', 'genesis_do_post_content' );
[/php]

Second, I write a basic if-then function to display my videos on the blog page.
[php]<?php
add_action( 'genesis_post_content', 'custom_do_post_content' );
function custom_do_post_content() {
global $post;
if ( $post->post_type == 'wps_videos') {
if( genesis_get_custom_field('_wps_videoembedcode') != '' ) {
?>
<div id="post-<?php the_ID(); ?>" class="video-entry">
<div class="video-embed">
<?php echo genesis_get_custom_field('_wps_videoembedcode'); ?>
</div><!-- end .video-embed -->
<div class="clear"></div>
<?php genesis_do_post_content(); ?>
</div><!-- end .video-entry -->
<?php
}
} //end wps_videos
else {
genesis_do_post_content();
}
}
[/php]

Now, in both, I simply referred back to the genesis_do_post_content() because I just wanted a way to insert my videos for posts with the video custom post type.

Now as with any Genesis template, to initiate the framework, we have to add the Genesis call.
[php]<?php
genesis();
?>[/php]

All Together

[php]<?php
/**

Template Name: Custom Blog

*/

// Custom Loop
remove_action('genesis_loop', 'genesis_do_loop');
add_action( 'genesis_loop', 'custom_do_loop' , 5 );
function custom_do_loop() {
$include = genesis_get_option('blog_cat');
$exclude = genesis_get_option('blog_cat_exclude') ? explode(',', str_replace(' ', '', genesis_get_option('blog_cat_exclude'))) : '';
$cf = genesis_get_custom_field('query_args'); /** Easter Egg **/
$args = array(
'showposts' => genesis_get_option('blog_cat_num'),
'post_type' => array( 'post' , 'wps_videos' ),
'tax_query' => array(
'relation' => 'OR',
array(
'taxonomy' => 'wps_vidcategory',
'field' => 'id',
'terms' => array( 92 )
),
array(
'taxonomy' => 'category',
'field' => 'id',
'terms' => array( $include )
),
)
);
genesis_custom_loop( $args );
}

// Customize the post meta function
add_filter( 'genesis_post_meta' , 'post_meta_filter' );
function post_meta_filter( $post_meta ) {
global $post;
if ( $post->post_type == 'wps_videos' ) {
$vid_cats = get_the_term_list( $post->ID, 'wps_vidcategory' , '' , ', ' , '' );
$post_meta = sprintf( '<span class="categories">%2$s%1$s</span> ', $vid_cats, 'Filed Under: ' );
}
else {
$post_meta = 'Filed Under: Custom Post Types, Genesis, Tutorials, WordPress';
}
return $post_meta;
}

// Customize the content
remove_action( 'genesis_post_content', 'genesis_do_post_content' );
add_action( 'genesis_post_content', 'custom_do_post_content' );
function custom_do_post_content() {
global $post;
if ( $post->post_type == 'wps_videos') {
if( genesis_get_custom_field('_wps_videoembedcode') != '' ) {
?>
<div id="post-<?php the_ID(); ?>" class="video-entry">
<div class="video-embed">
<?php echo genesis_get_custom_field('_wps_videoembedcode'); ?>
</div><!-- end .video-embed -->
<div class="clear"></div>
<?php genesis_do_post_content(); ?>
</div><!-- end .video-entry -->
<?php
}
} //end wps_videos
else {
genesis_do_post_content();
}
}

genesis();
?>
[/php]

Written by Travis Smith · Categorized: Custom Post Types, Genesis, Tutorials, WordPress

  • « Previous Page
  • 1
  • 2
  • 3
  • 4
  • …
  • 6
  • Next Page »
  • Twitter
  • Facebook
  • LinkedIn
  • Google+
  • RSS

Copyright © 2025 � WP Smith on Genesis on Genesis Framework � WordPress � Log in